

How To Do A Bounce On Iphone
Do you want to quickly convert a Live Photo to video? When you share a Live Photo, the animation is often lost. That's why it's important to convert to video first. In this article, you'll discover how to convert your Live Photos to videos using the Lively app. Then you'll learn how to share these videos right from the Photos app!

Table Of Contents: Live Photo To Video
Click any title link below to go straight to that section of the article:
Section 1: Why Convert A Live Photo To Video?
Section 2: How To Make Live Photo A Video In Lively
2.1 Edit A Live Photo In Lively
2.2 How To Save Live Photo As Video In Lively
2.3 What's the Difference Between Videos and GIFs?
Section 3: Convert Live Photos To Loop And Bounce Videos
Section 4: How To Share Your Live Photo Content
4.1 Share Live Photo Content Via AirDrop
4.2 Share Live Photo Content In A Text Message Or iMessage
4.3 Share Live Photo Content Via Email
4.4 Share Live Photo Content Via iCloud Photo Sharing
4.5 Share Live Photo Content on Facebook
4.6 Share Live Photo Content On Instagram
Section 1: Why Convert A Live Photo To Video?
When you take a Live Photo, you may want to share it with family and friends. However, Live Photos don't always share as high-quality videos. The animated footage sometimes gets converted to a still image.
This is why you often need to save a Live Photo as a video file before sharing.
Section 2: How To Make Live Photo A Video In Lively
The Lively app offers a simple way to save your Live Photos as videos. You can download Lively for free in the App Store.

While the app is free to download, a "Lively" watermark appears in the lower right corner of saved GIFs. A one-time purchase of $2.99 is required to remove the watermark from all GIFs.
Note that the watermark is not applied to video files.
2.1 Edit A Live Photo In Lively
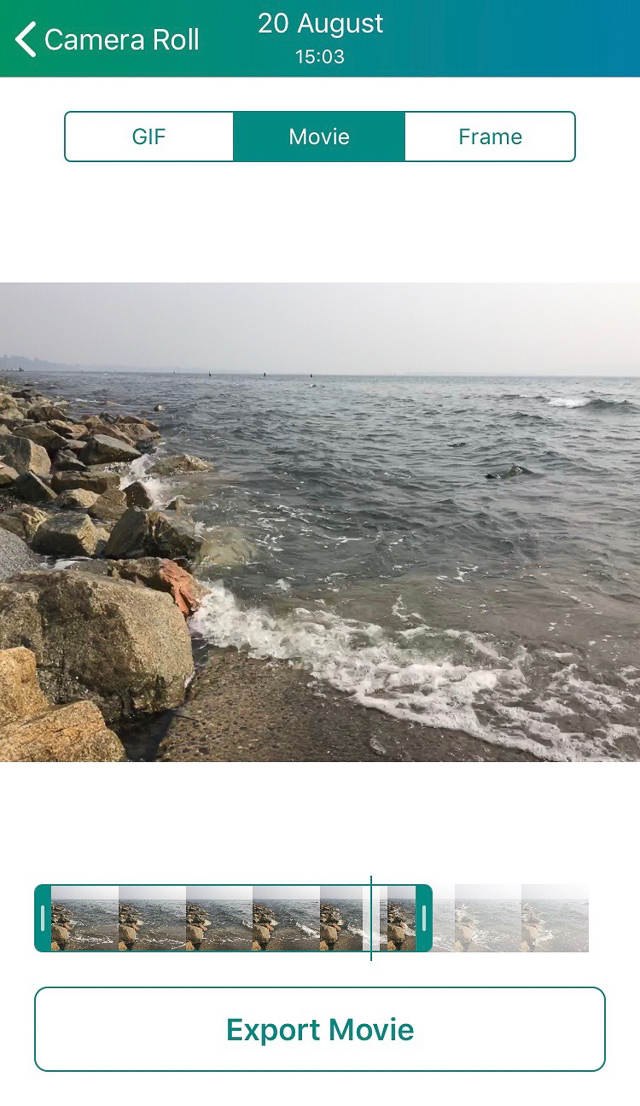
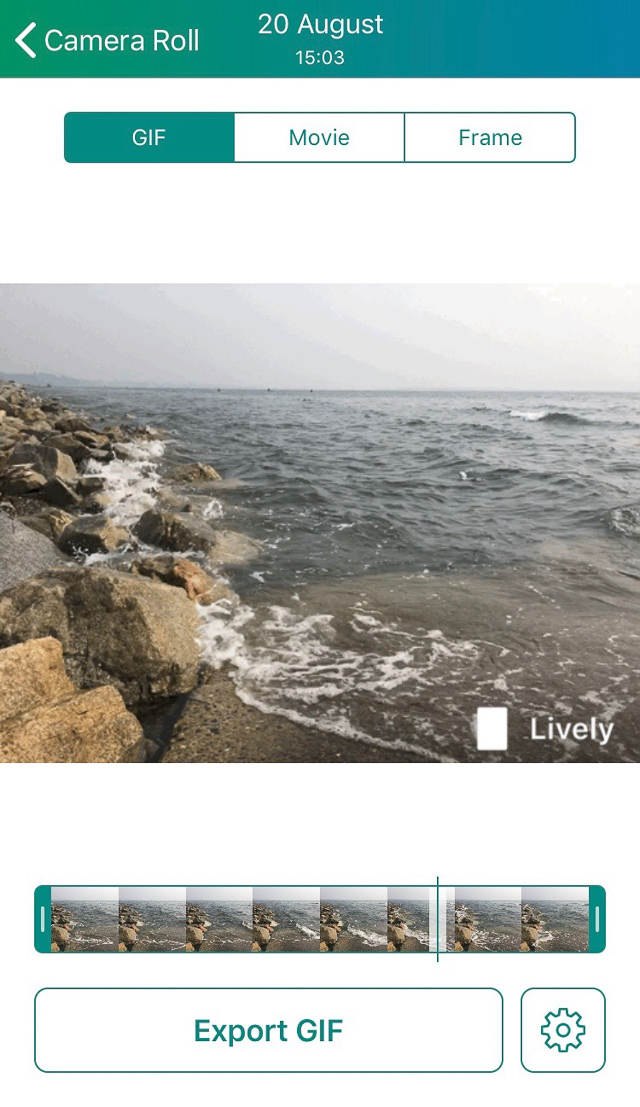
To create a Live Photo video, tap on one of your Live Photos in the Lively app. Then select Movie at the top of the screen. Now you'll see the three-second Live Photo playing as a video on repeat.
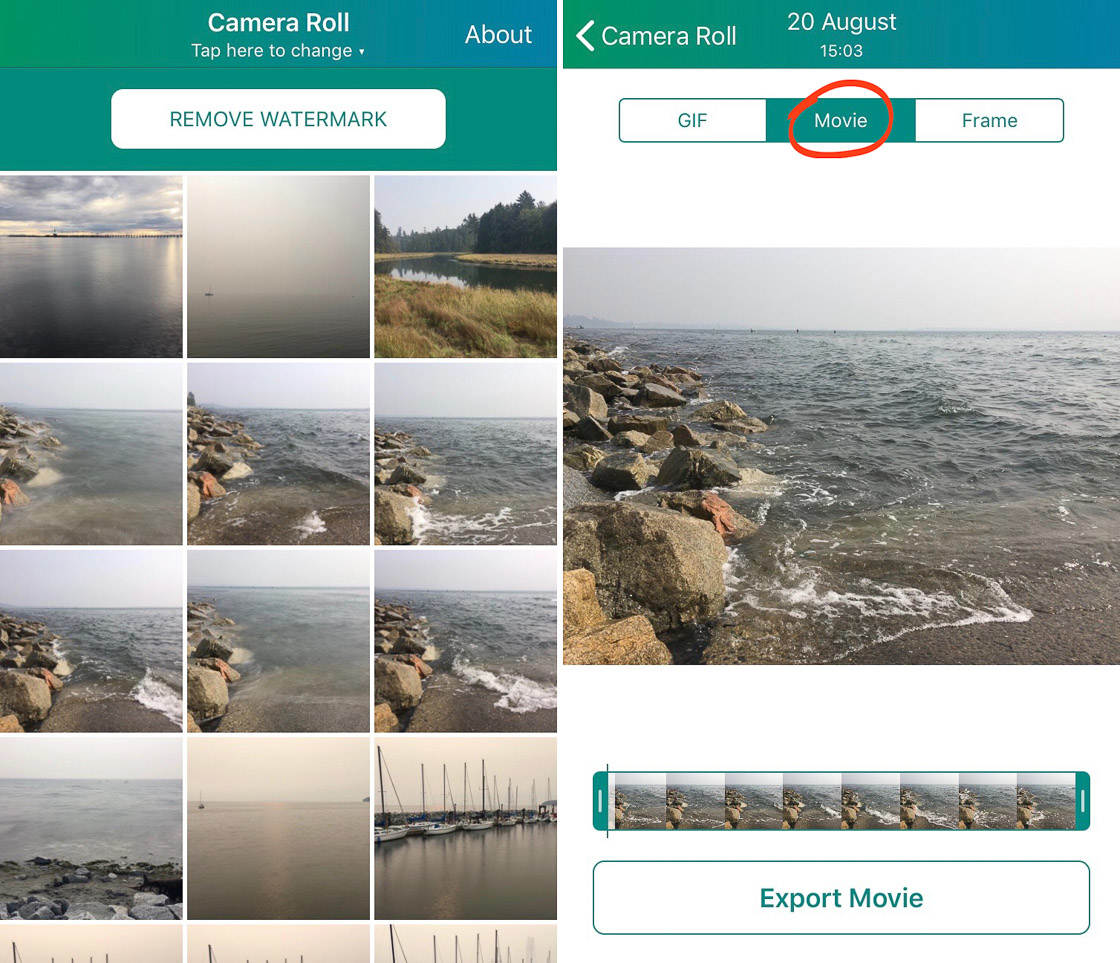
You can make a few minor adjustments to the video before you save it. Near the bottom is the video's progress reel. You can change the length of the video by dragging the start or end bars.
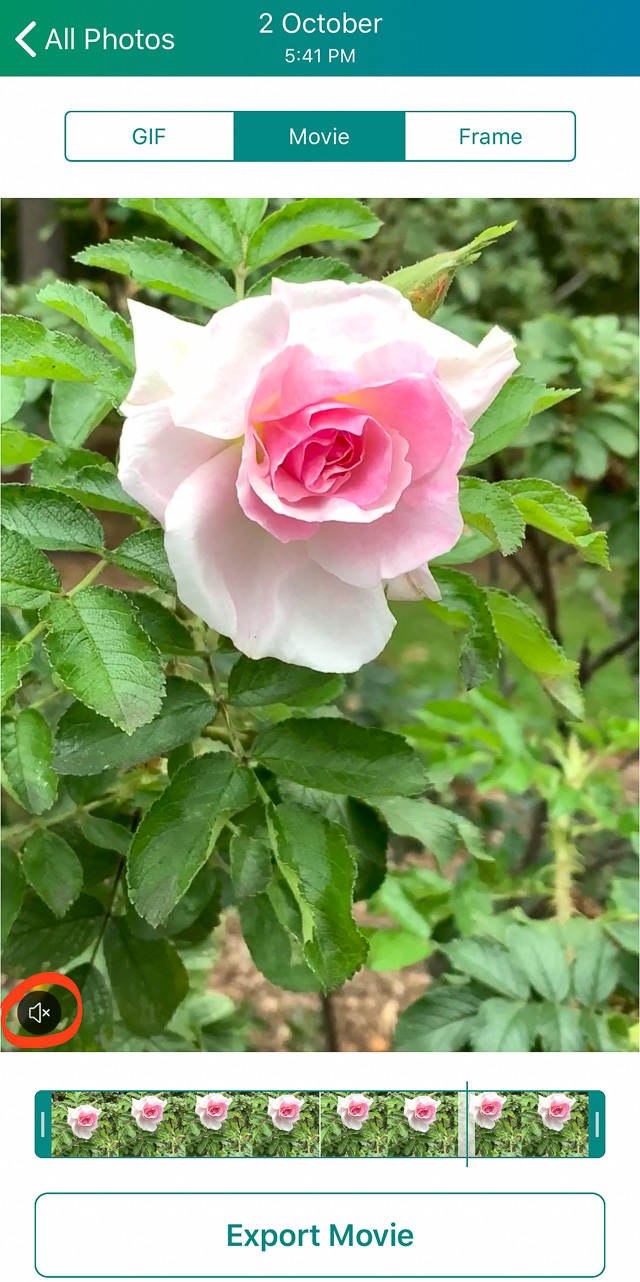
You can also save Live Photo as a video with or without sound. Tapping on the video turns the sound on and off. Additionally, the Sound icon is displayed in the bottom left corner of the video. Make sure you have your desired sound setting before you export your video.
2.2 How To Save Live Photo As Video In Lively
Once you've finished editing your video, tap Export Movie at the bottom of the screen.
You'll see several options for saving and sharing. You can share your video via iMessage, email, Messenger, Facebook, Twitter, and Tumblr. However, you'll need to connect your iPhone to these accounts before you can share photos with them.
Along the bottom are the options to Save, Copy, andShare.
To save your new video, simply tap the Save icon in the bottom left. The video will now be saved in your Photos app.
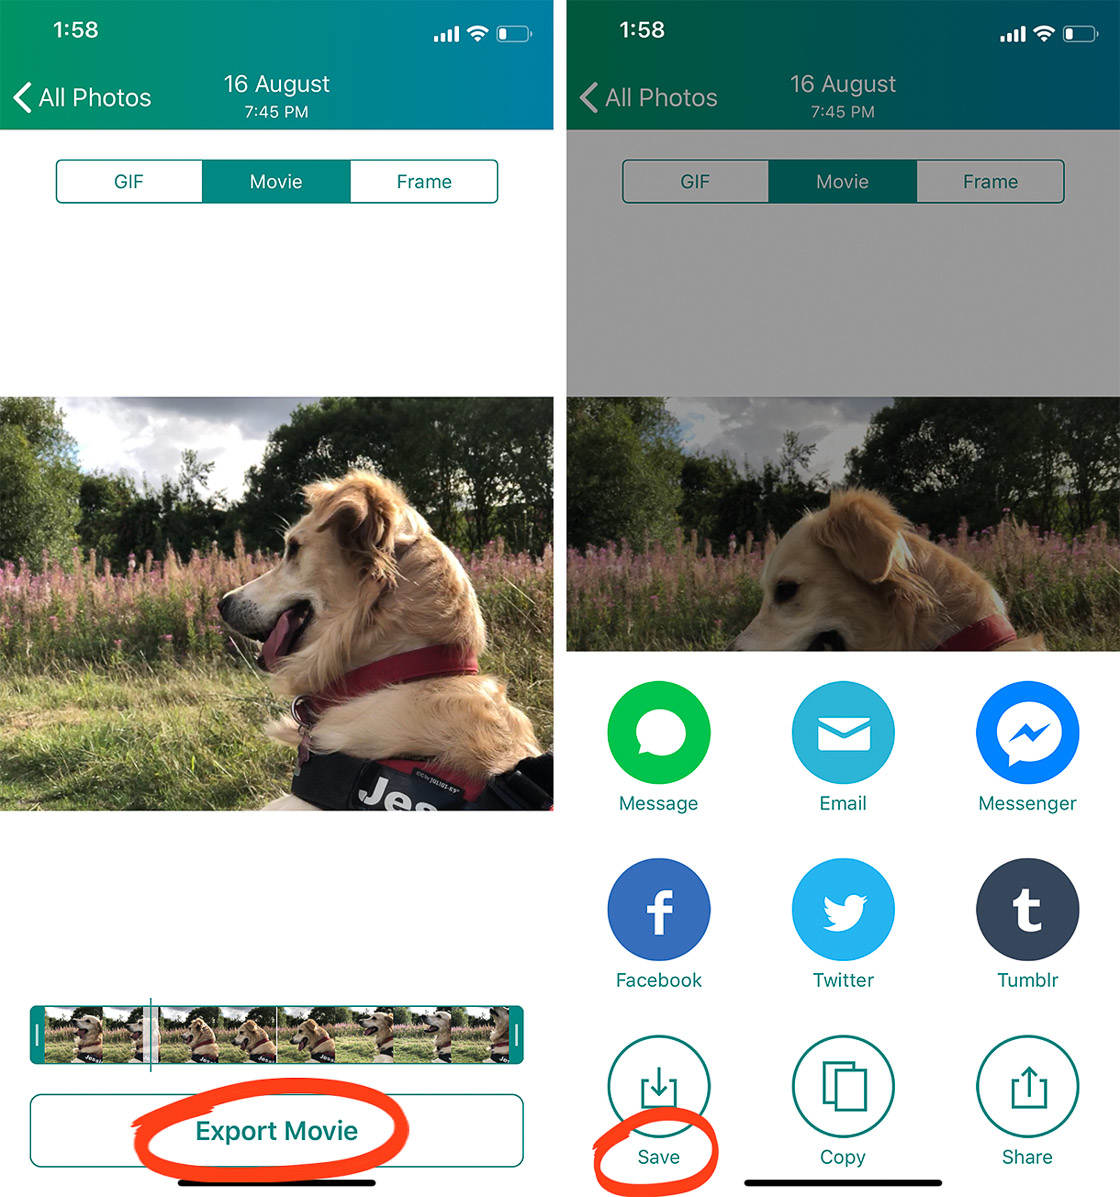
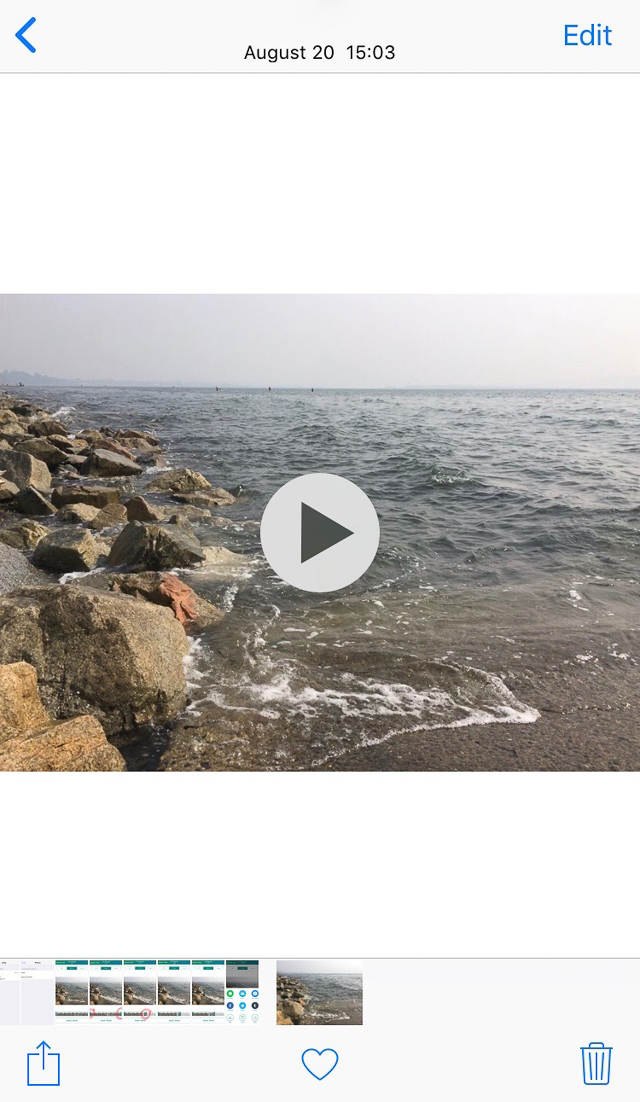
To watch the video, simply select it in the Photos app and tap the play button.
2.3 What's The Difference Between Videos and GIFs?
You may have noticed that Lively also has the option to save a Live Photo as a GIF. What is a GIF? A GIF is a short animation that plays on a continuous loop.
GIFs have lower resolution than regular videos, and they show jerky and unsteady footage. Also, GIFs don't save with sound. Plus, you can't always share GIFs on social media platforms.
Therefore, I recommend saving your Live Photos as video files. That way, you'll have more sharing options. Plus, your Live Photo videos will be higher quality.
Section 3: Convert Live Photos To Loop And Bounce Videos
If you don't want to use Lively to convert your Live Photos to videos, don't worry. There's another way to do this.
You just have to use Loop and Bounce effects. These are built right into the Photos app!
What are Loop and Bounce effects?
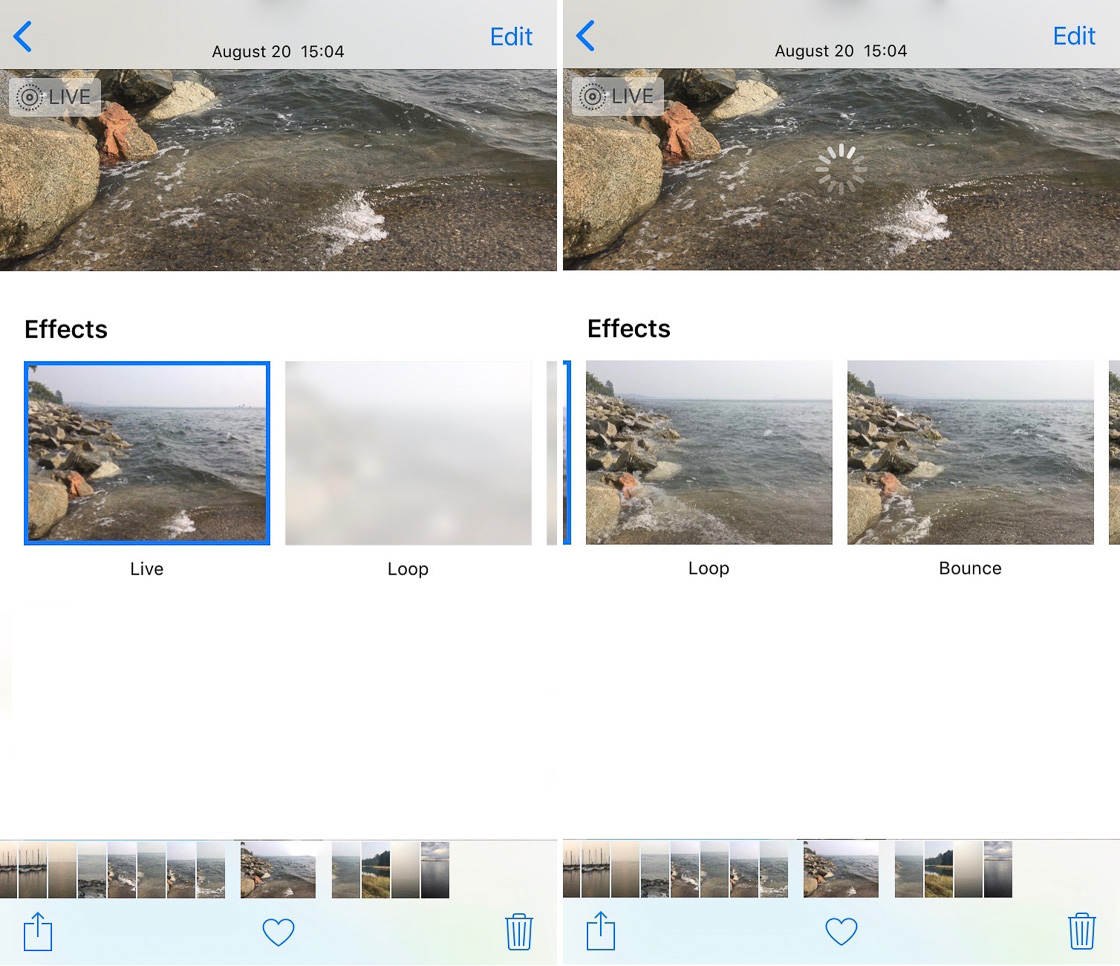
Since iOS 11, the Live Photos feature has offered two new video effects.Loop makes a Live Photo play over and over. Bounce makes a Live Photo play forward and backward. The Loop and Bounce effects each create a continuous video.
To create a Loop or Bounce effect, select a Live Photo in the Photos app.
Swipe up, and you'll see the Loop and Bounce options. Tap on the effect you want. It will immediately be applied to your Live Photo.
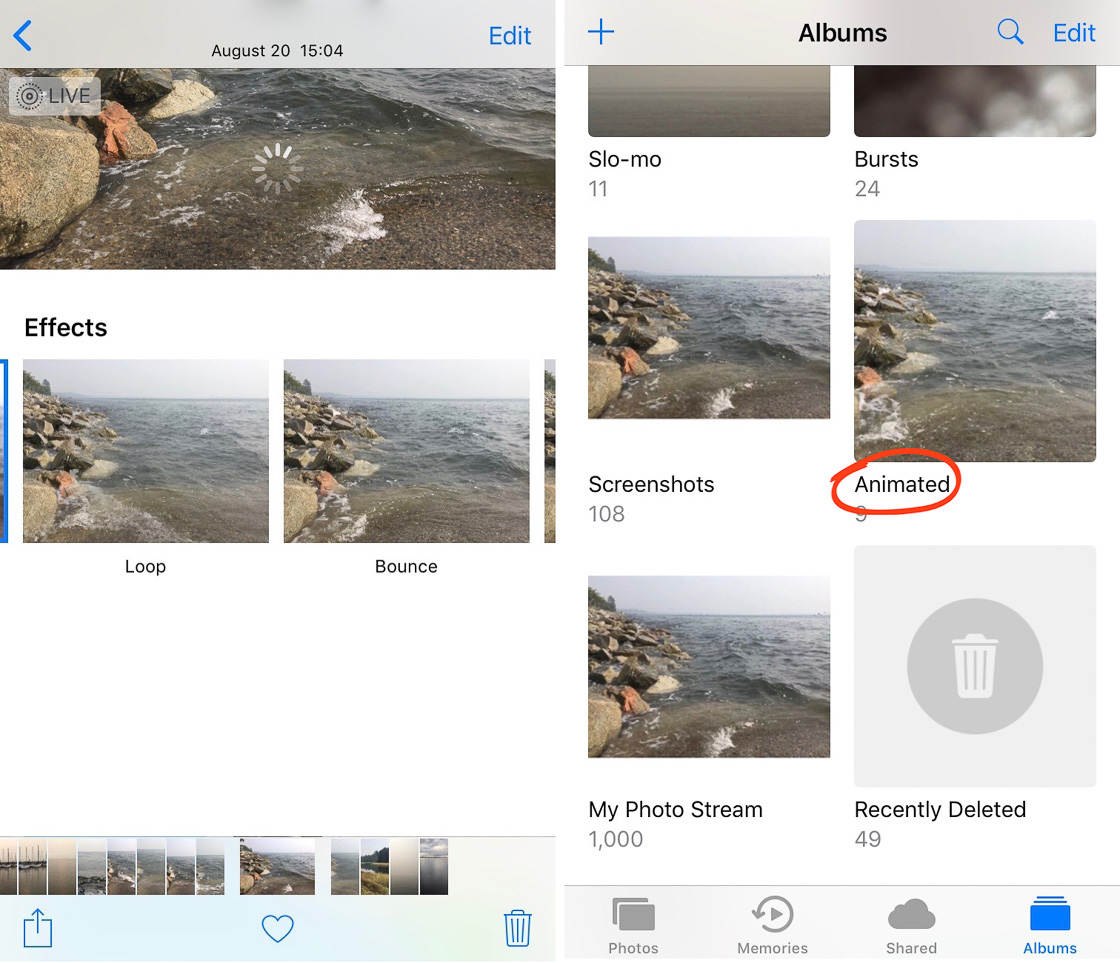
When you convert a Live Photo to a Loop or Bounce video, it's automatically saved in the Animated album.
However, there's one significant drawback: Loop and Bounce videos don't have sound.
Yet there's no need to worry about choosing an effect you don't like. You can always change the effect afterward.
How do you do this?
First, select the Loop or Bounce video. Then swipe up to access the Effects menu. Choose a new effect, or tap Live to remove the effect entirely. That's all!
If you're looking to quickly create fun videos with your Live Photos, look no further than the Loop and Bounce effects.
Section 4: How To Share Your Live Photo Content
Once you've created a Live Photo, a Live Photo video in Lively, or a Loop/Bounce video, you can share it with others.
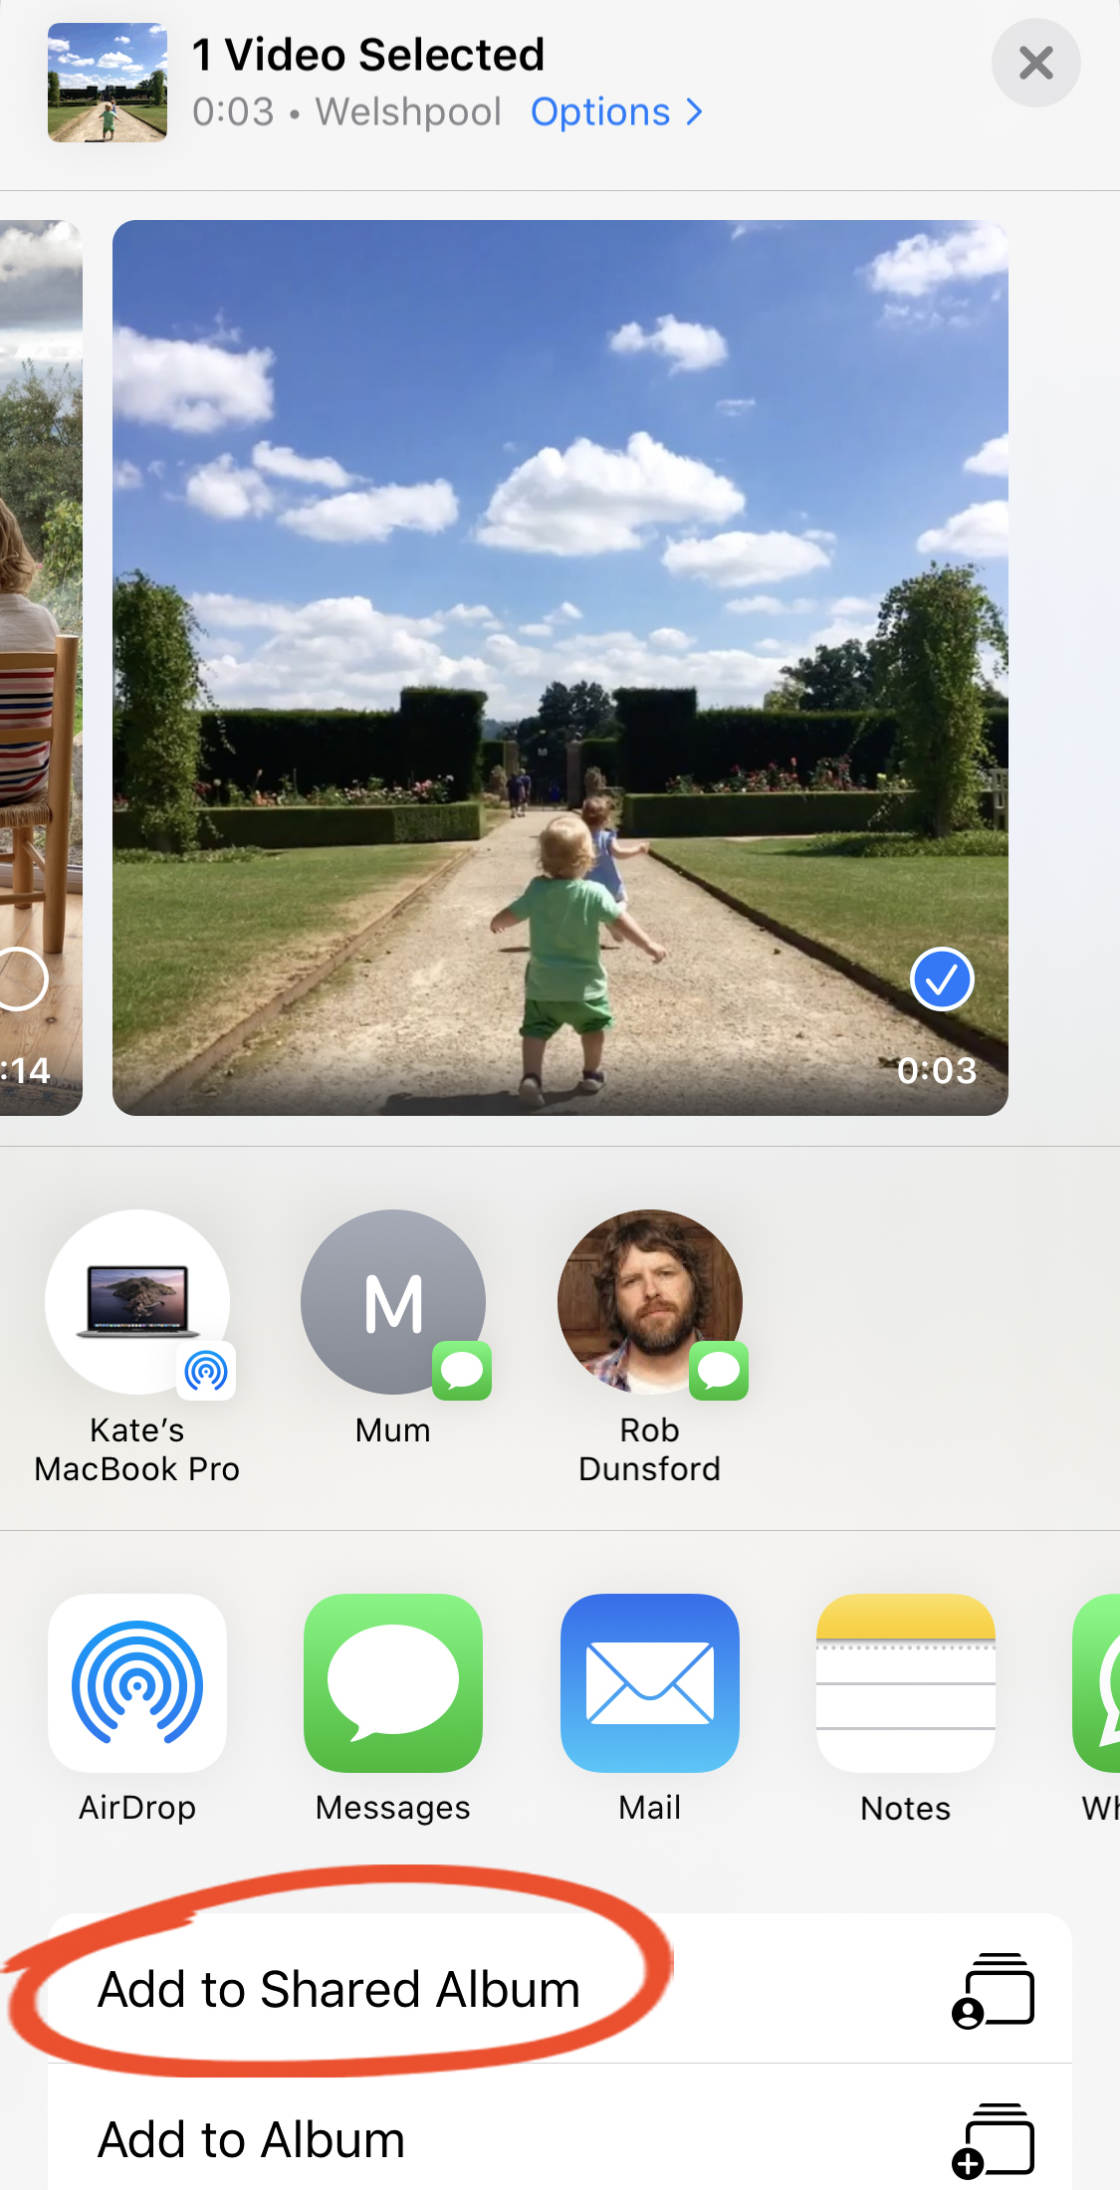
Go to your Photos app and find your content. Open it. Then tap the Share icon in the bottom left corner.
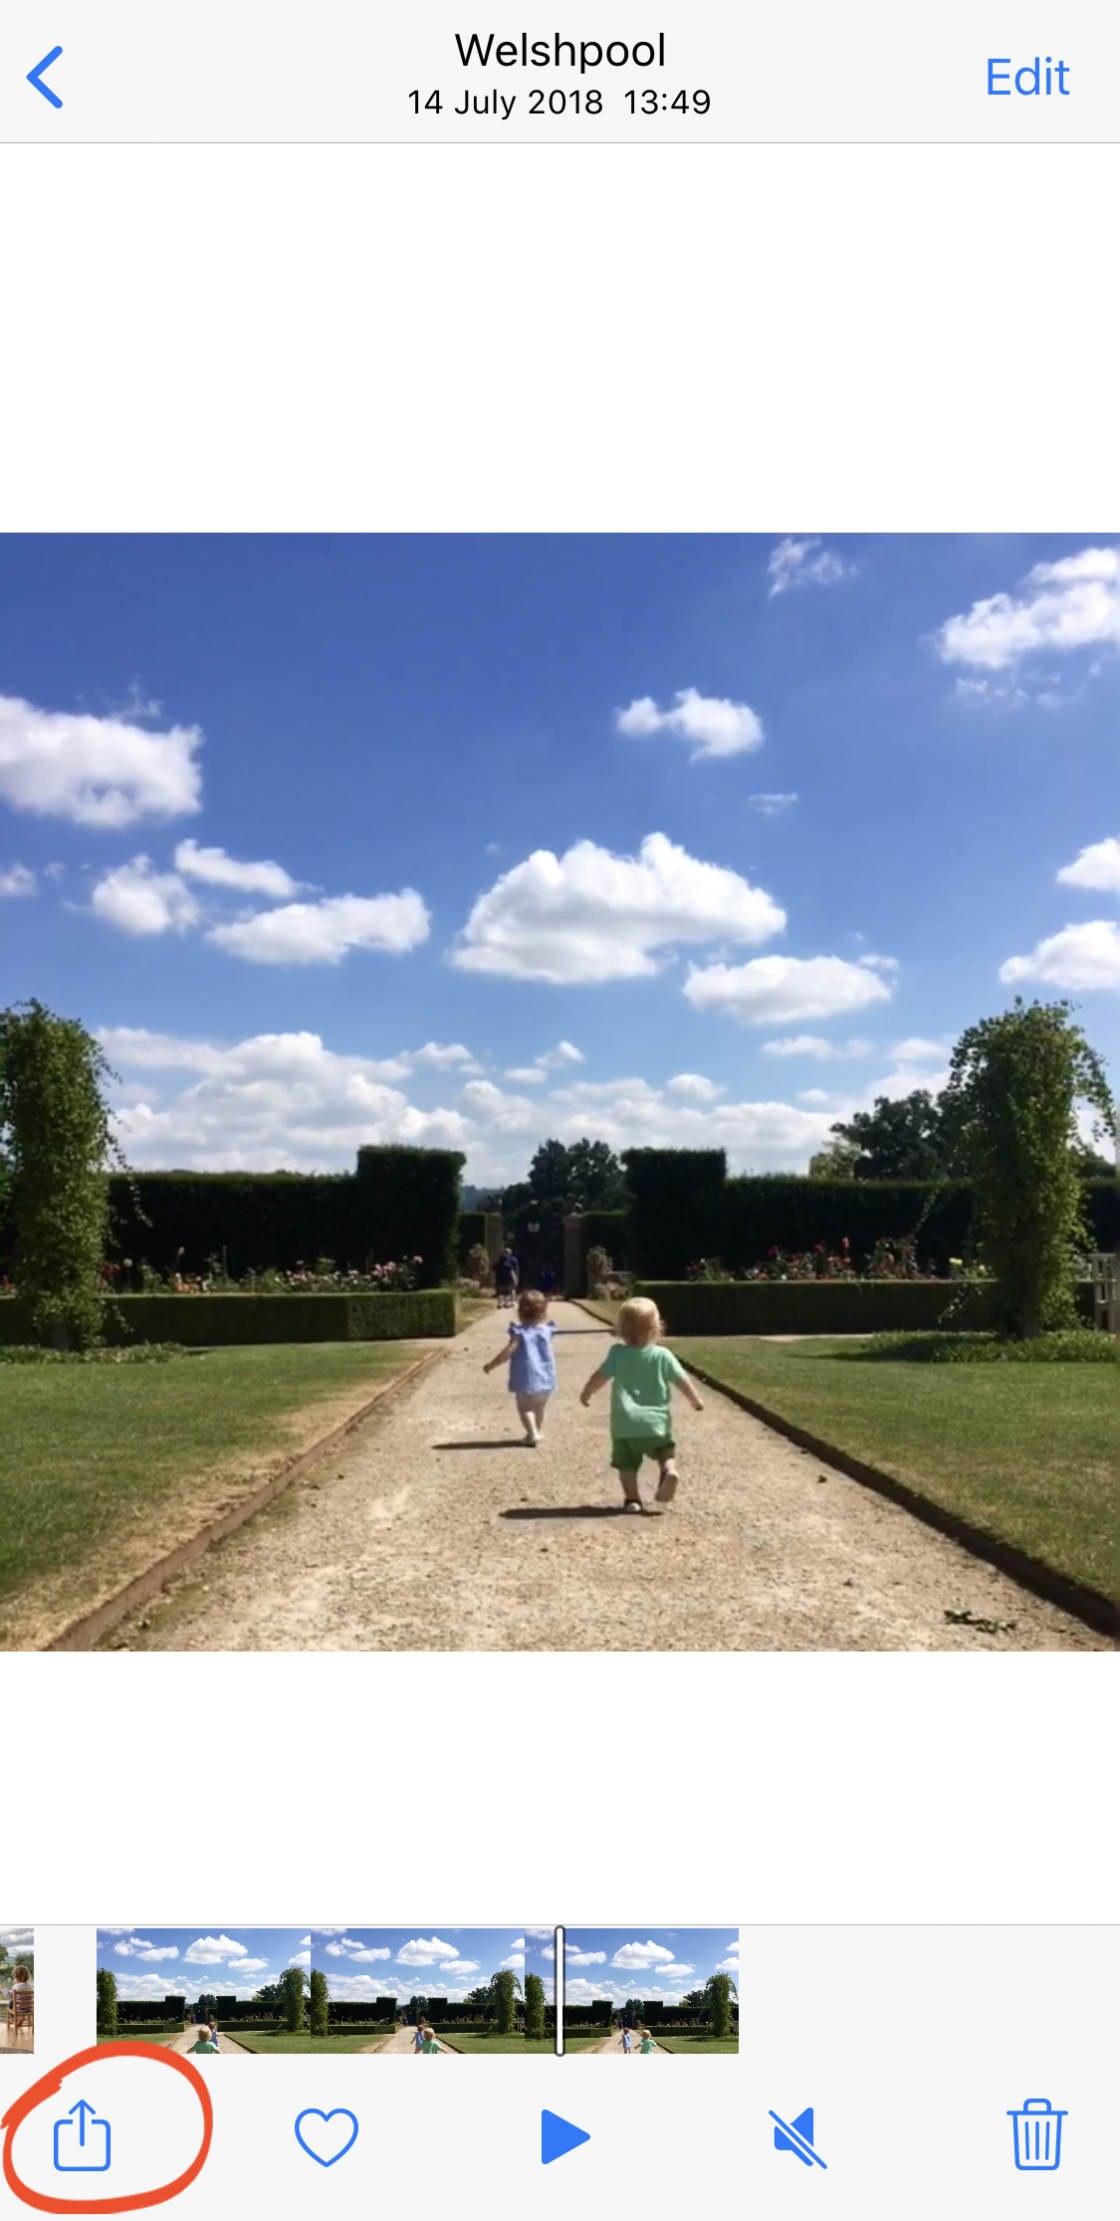
The sharing menu will open as shown below.
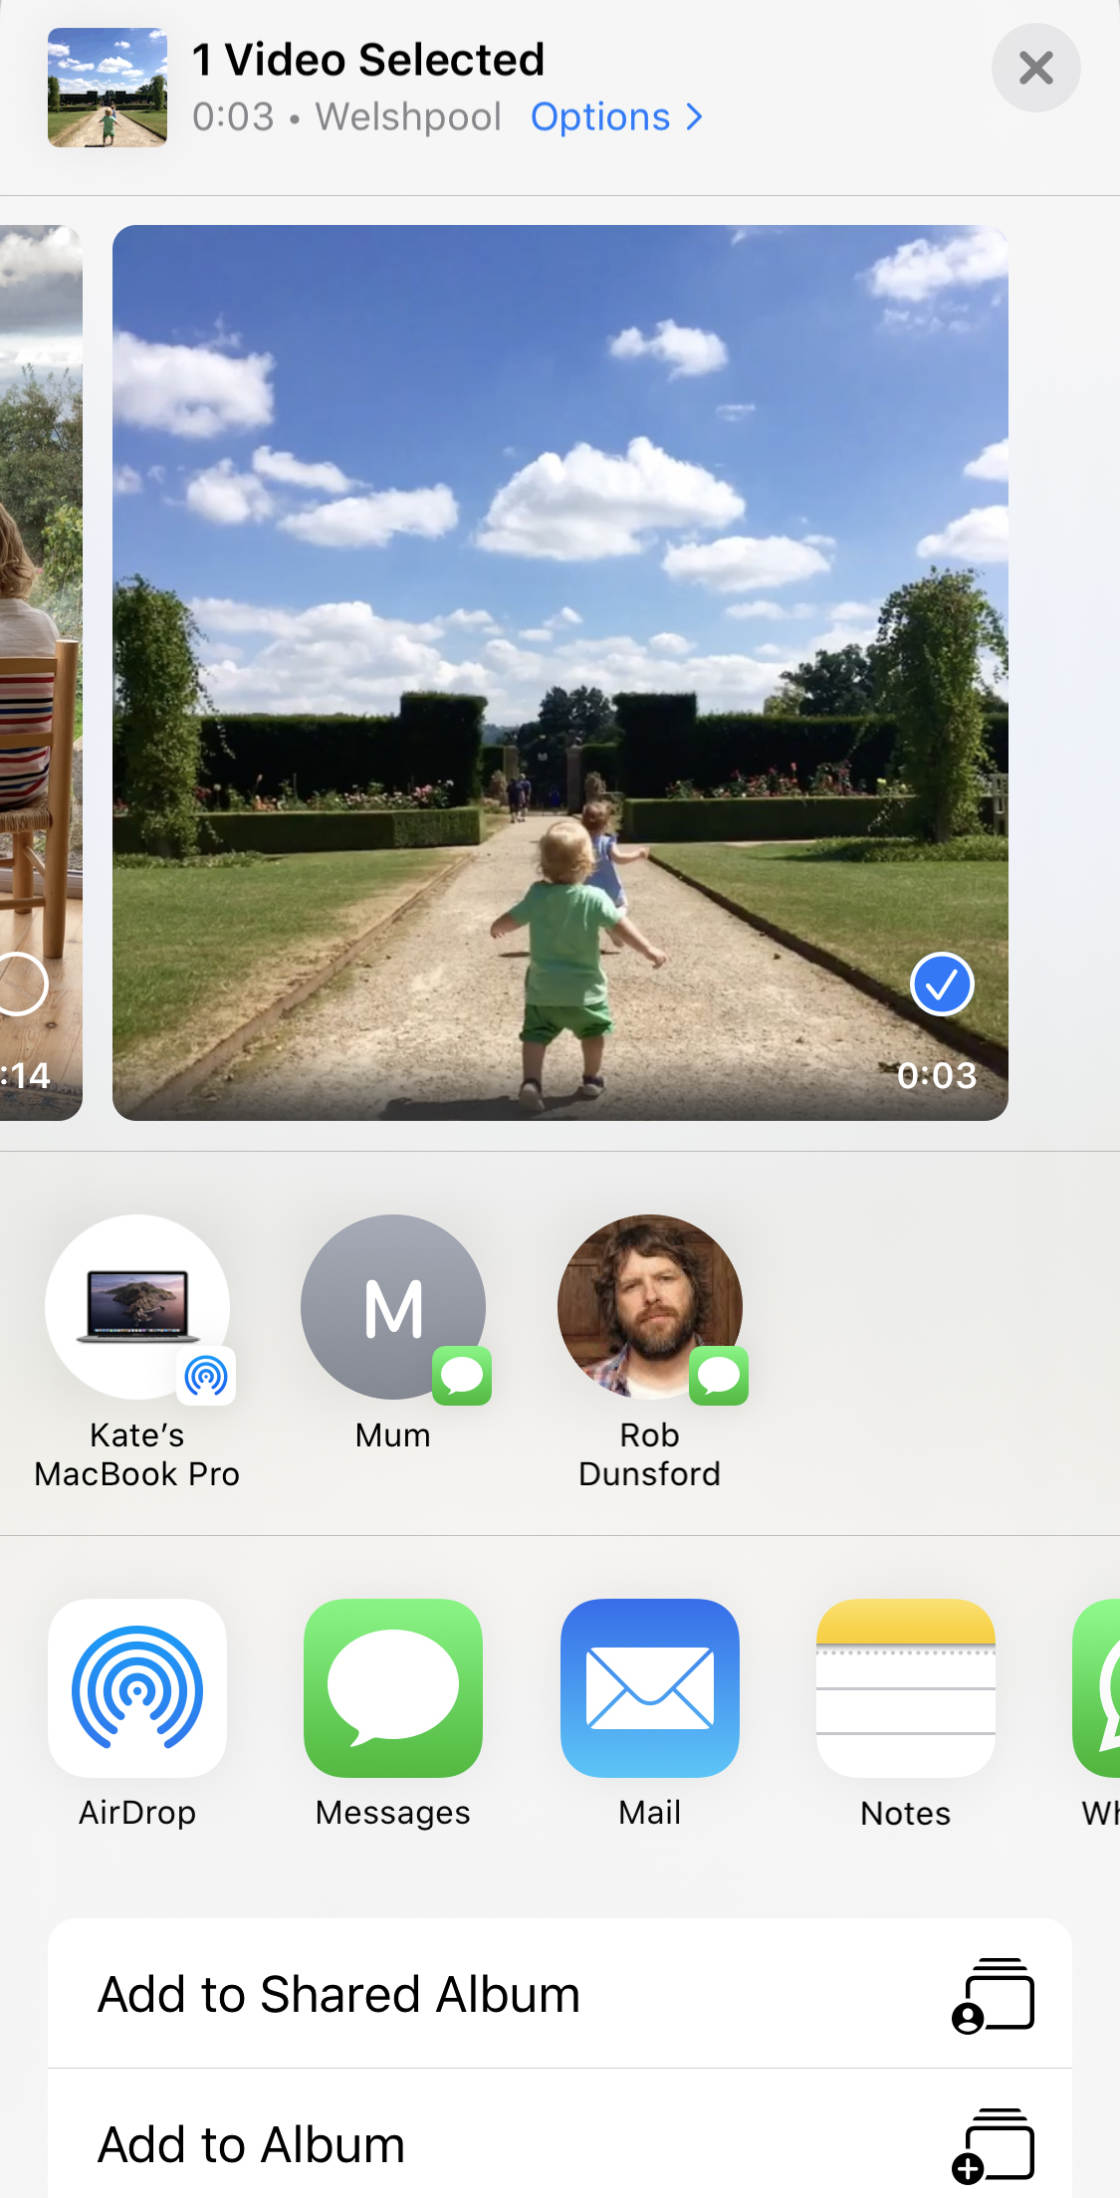
This gives you many options, which I'll explain below.
4.1 Share Live Photo Content Via AirDrop
One way to share your Live Photo content with others is through AirDrop. Note that you can't use AirDrop to send media to Android users or PC users. AirDrop only transfers media between iPhone, iPad, and Mac users.
What can you share via AirDrop?
You can share a Live Photo video. To do this, tap AirDrop, then tap the device you want to send the video to.
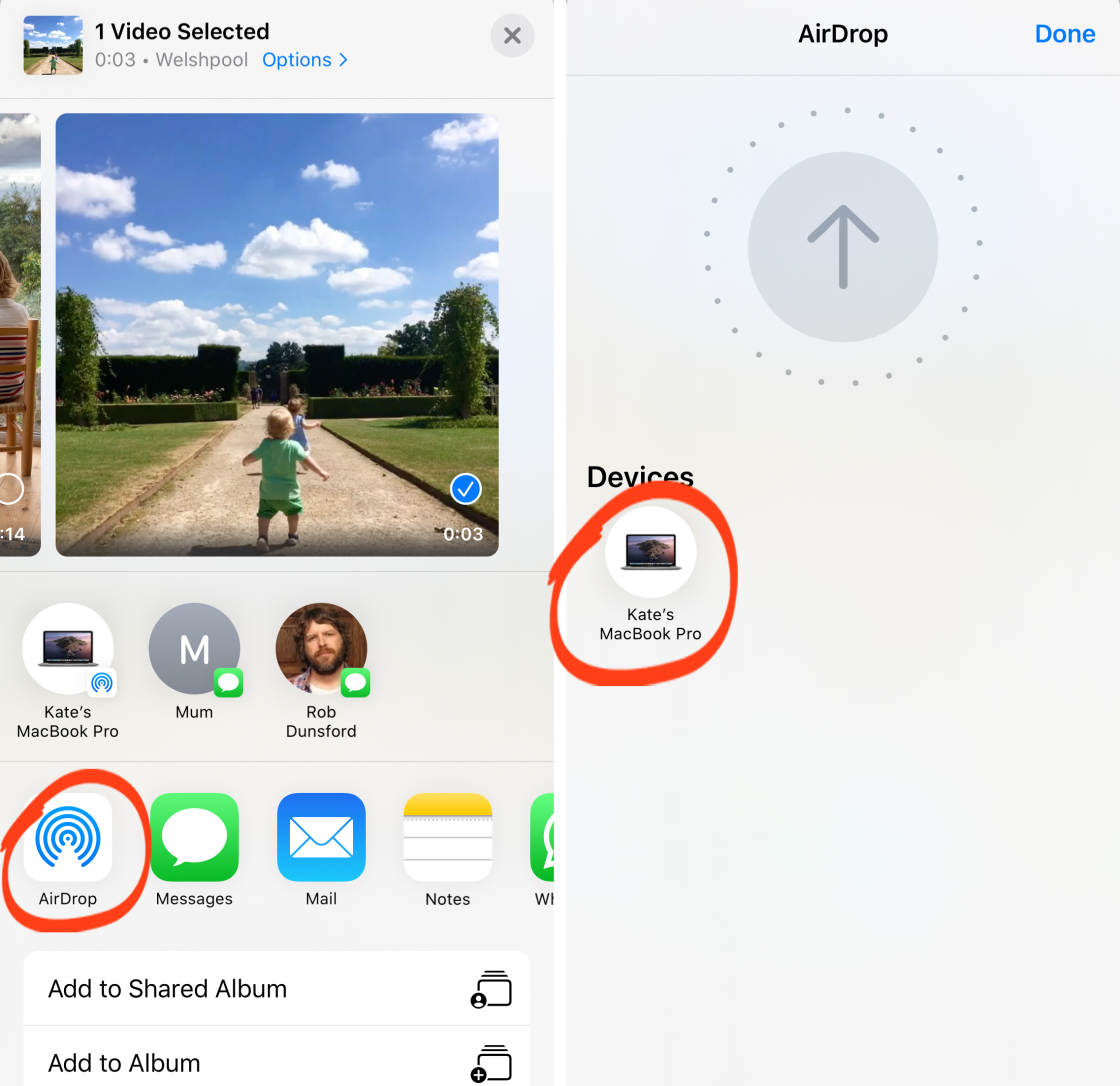
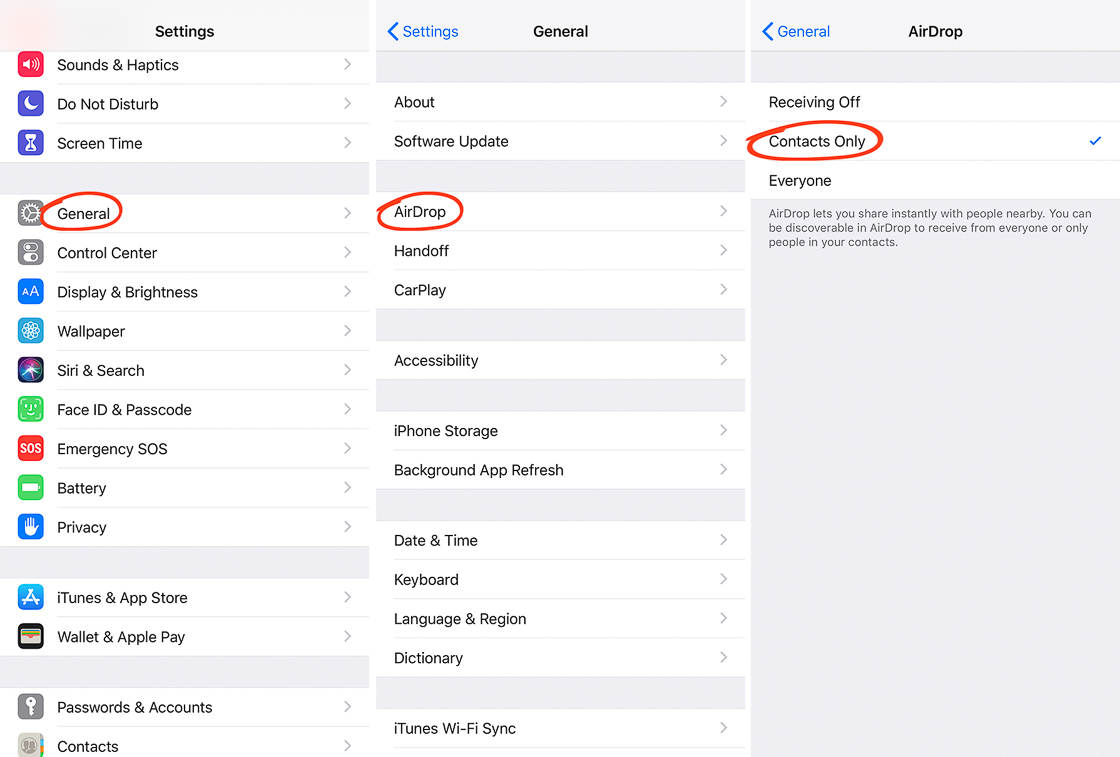
If the user doesn't receive the video, make sure they are set up to receive files through AirDrop. To check this, have them tap Settings. Have them select General, then AirDrop.
Make sure they choose to receive AirDrop files from contacts (or everyone).
You cannot share a Loop or Bounce video via AirDrop to a Mac computer. If you share a Loop or Bounce video via AirDrop to a Mac computer, it's transferred as a normal video file. This means that the recipient will not be able to view it continuously—the video will stop after three seconds.
If you share a Loop video, viewers will see this:
If you share a Bounce video, viewers will see this:
However, you can share the original Loop or Bounce video via AirDrop to another iPhone user.
Finally, you cannot share a Live Photo via AirDrop to a Mac computer. It will be transferred as a still image. However, youcanshare a Live Photo via AirDrop to another iPhone or iPad user. Follow the same process for sharing a Live Photo video.
4.2 Share Live Photo Content In A Text Message Or iMessage
You can also share Live Photo content through a text message or iMessage.
What can you share?
First, youcanshare a Live Photo video in a text message or iMessage.
You can also send a Loop or Bounce video via iMessage to an iPhone or iPad user. However, you cannot send a Loop or Bounce video via text message to a non-iPhone user.
Finally, you can send a Live Photo via iMessage to an iPhone or iPad user. But you cannot send a Live Photo via text message to a non-iPhone or iPad user.
How do you send Live Photo content in a text message or iMessage?
Tap on the Message icon, and add a recipient. Then tap the blue arrow to send the message.

4.3 Share Live Photo Content Via Email
You can share Live Photo content via email. What does this mean?
First, you can share a Live Photo video via email.
To share a video via email, tap your email icon. Add a recipient and compose a message. Then send the email!
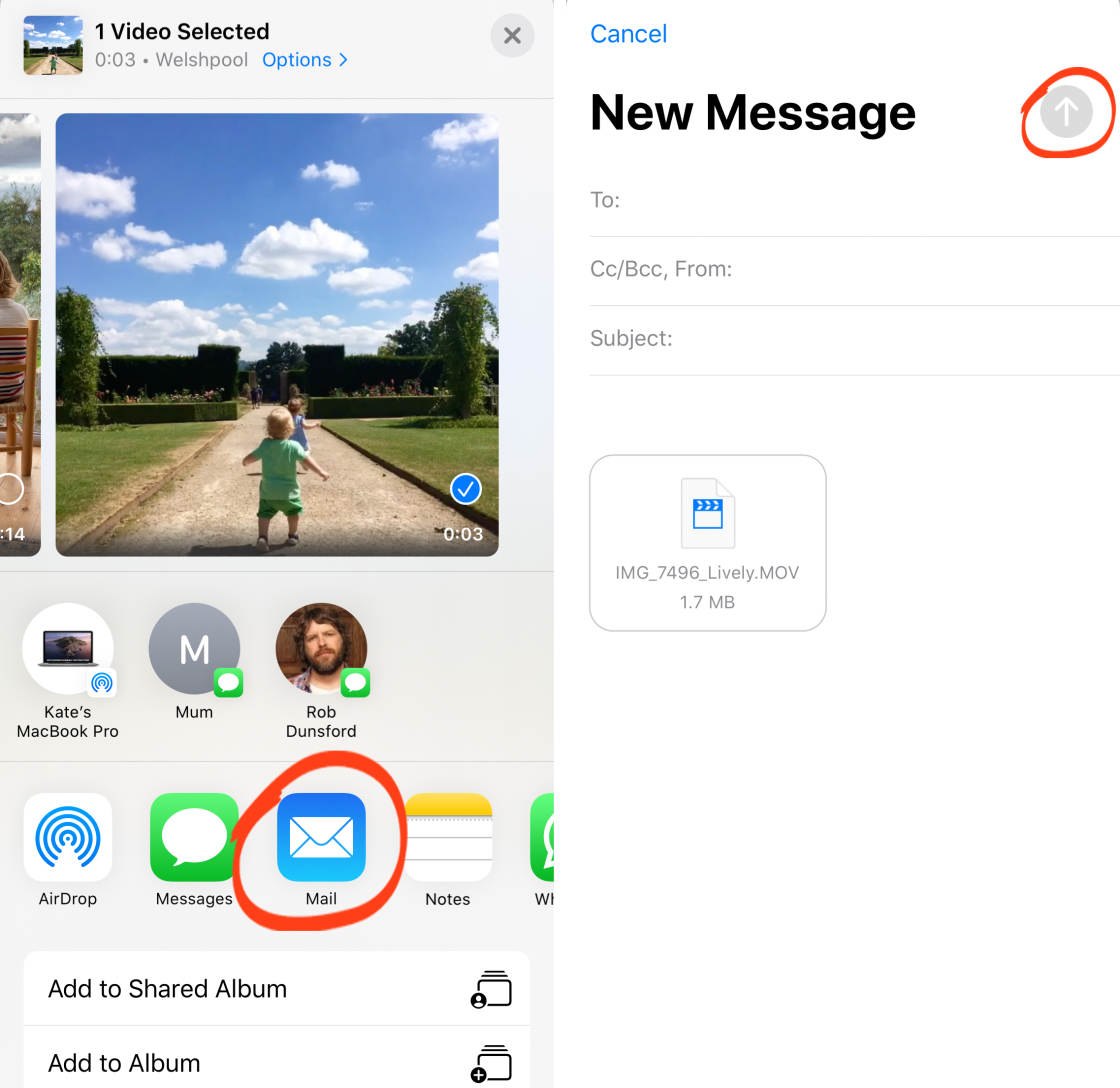
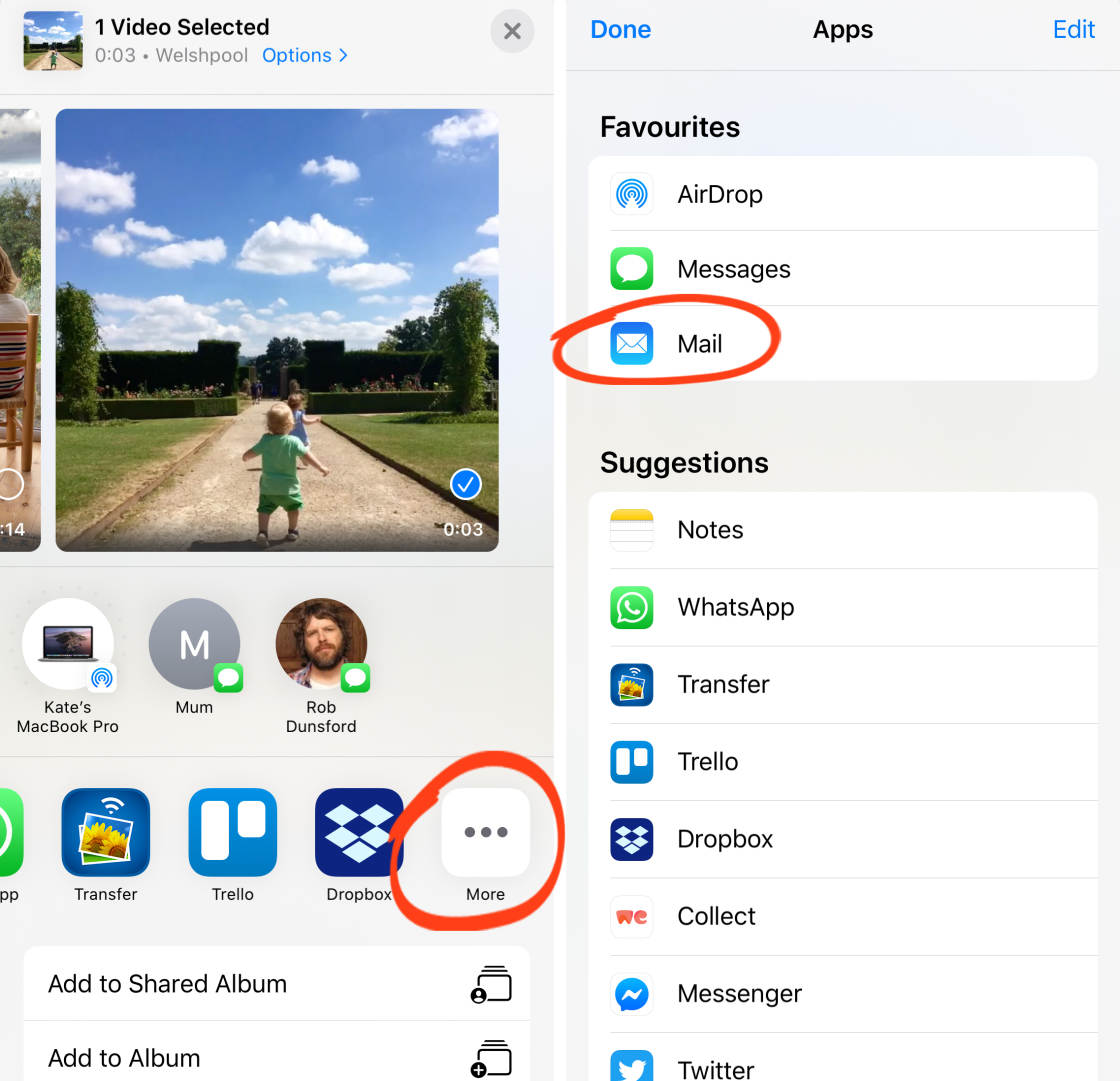
Note: If an email icon isn't present, scroll to the right. Tap the More icon and select the email icon. Then tap Done.
(The same process works for other apps, including Facebook and Instagram.)
You cannot send a Live Photo by email. If you send a Live Photo as an email attachment, it gets sent as an ordinary photo. The recipient will only see a still image, and they won't be able to view the moving version of your Live Photo.
What about sending a Loop or Bounce video in an email? It will be sent as a low-quality GIF. The resolution will not be as good as it is on your iPhone. Therefore, it's best to avoid this option.
4.4 Share Live Photo Content Via iCloud Photo Sharing
Do you have any albums shared through iCloud Photo Sharing? If so, you can share Live Photo content through these albums.
What content can you share?
First, youcanshare a Live Photo video with shared albums. You can also share Loop and Bounce videos with shared albums. The same is true for original Live Photos.
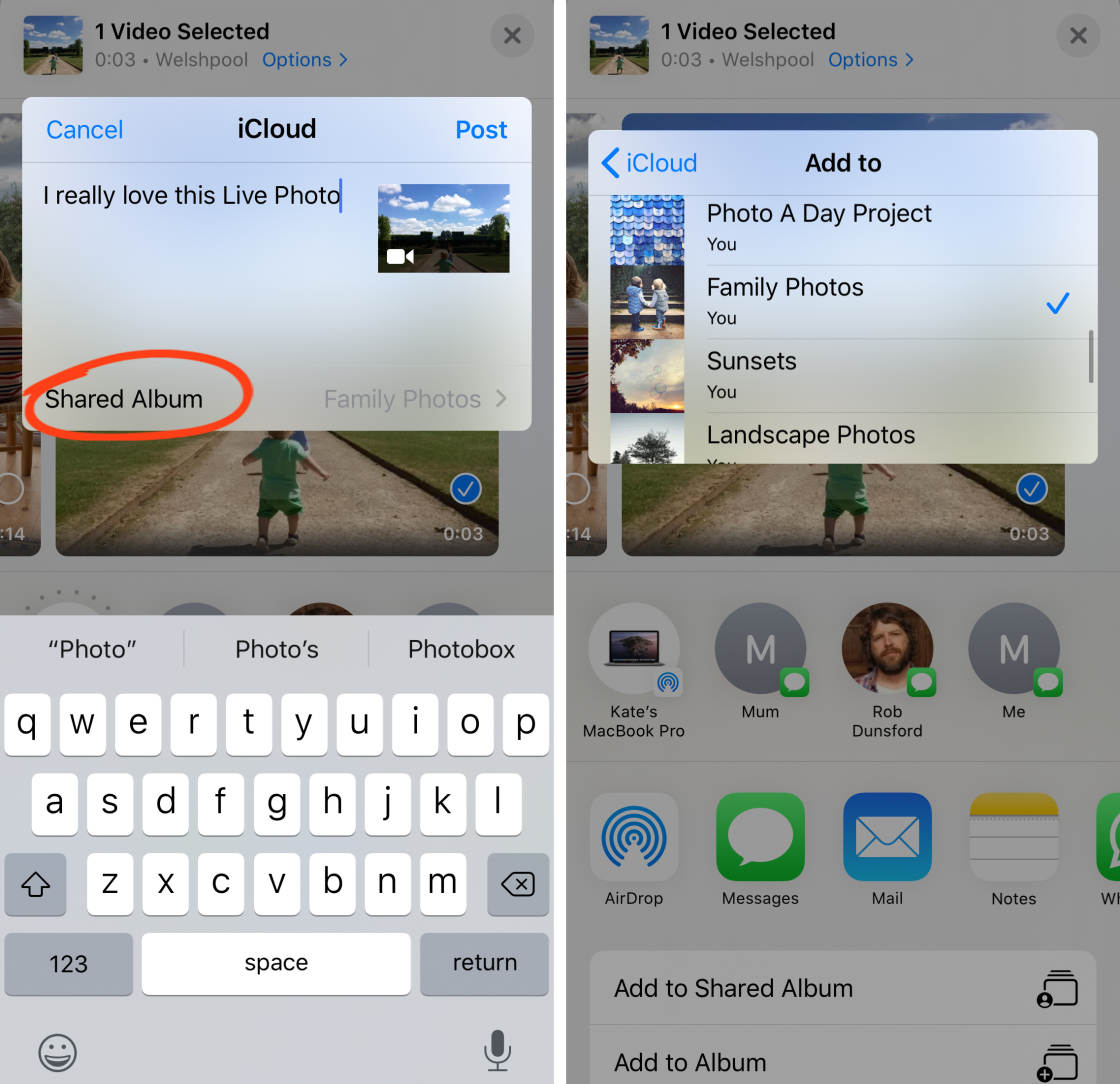
In the sharing menu, select Add To Shared Album.
Write a comment if you wish. Then tap Shared Album to select the album you want to add the video to. Tap Post to share the video to the album.
4.5 Share Live Photo Content On Facebook
What Live Photo content can you share on Facebook?
First, you can share a Live Photo video on Facebook. You can also share Loop and Bounce videos on Facebook.
What about sharing Live Photos directly to Facebook?
Facebook allows you to share Live Photos, but they only appear animated when viewed on an iPhone or iPad. If you're using Facebook on any other device (e.g., computers, Android phones), the Live Photo will appear as a still image.
Do you want every user to see the animation on Facebook? Then you'll need to convert your Live Photo to video.
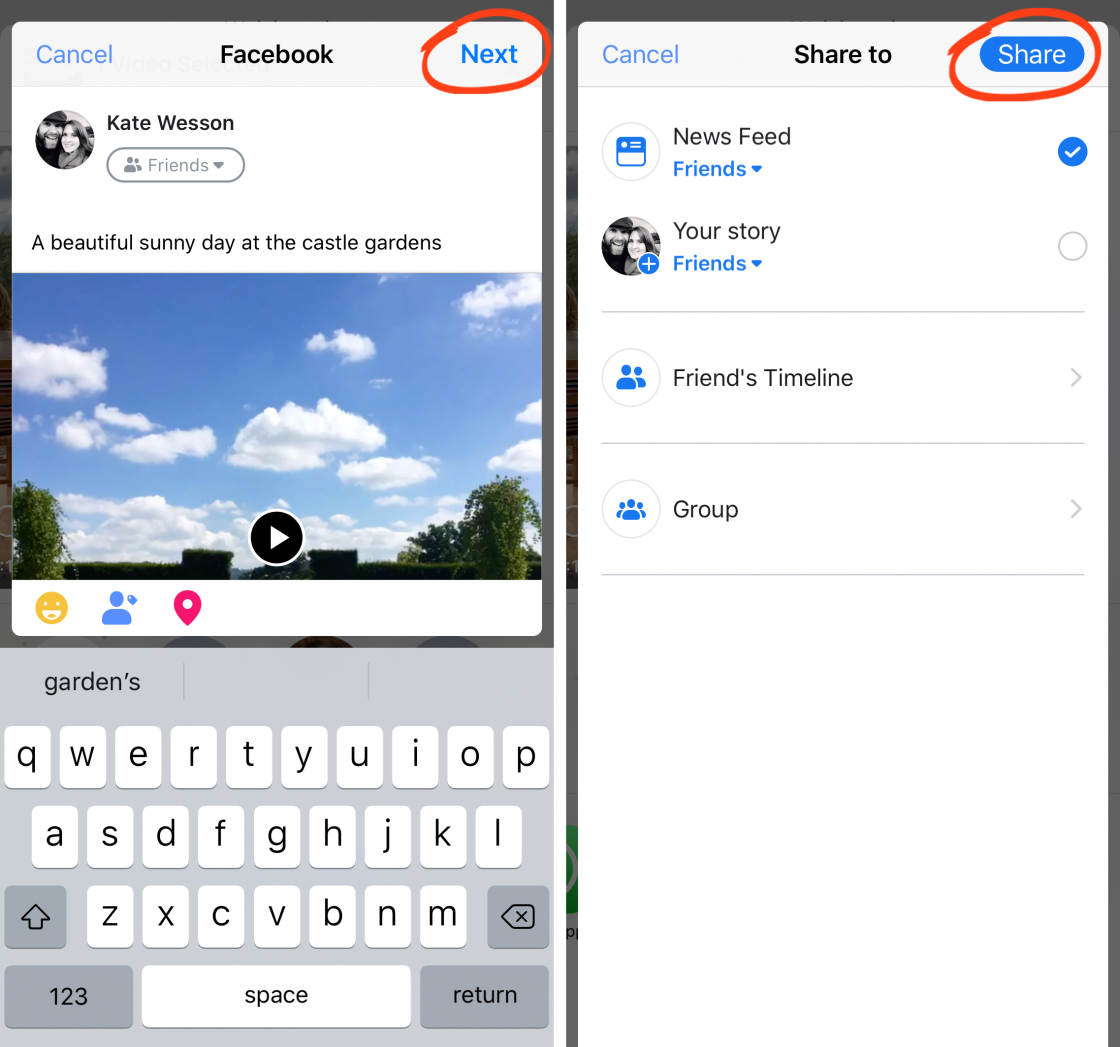
To share your content on Facebook, open the sharing menu. Look for the Facebook icon in the sharing options. If you don't see it, scroll right and selectMore, then select Facebook.
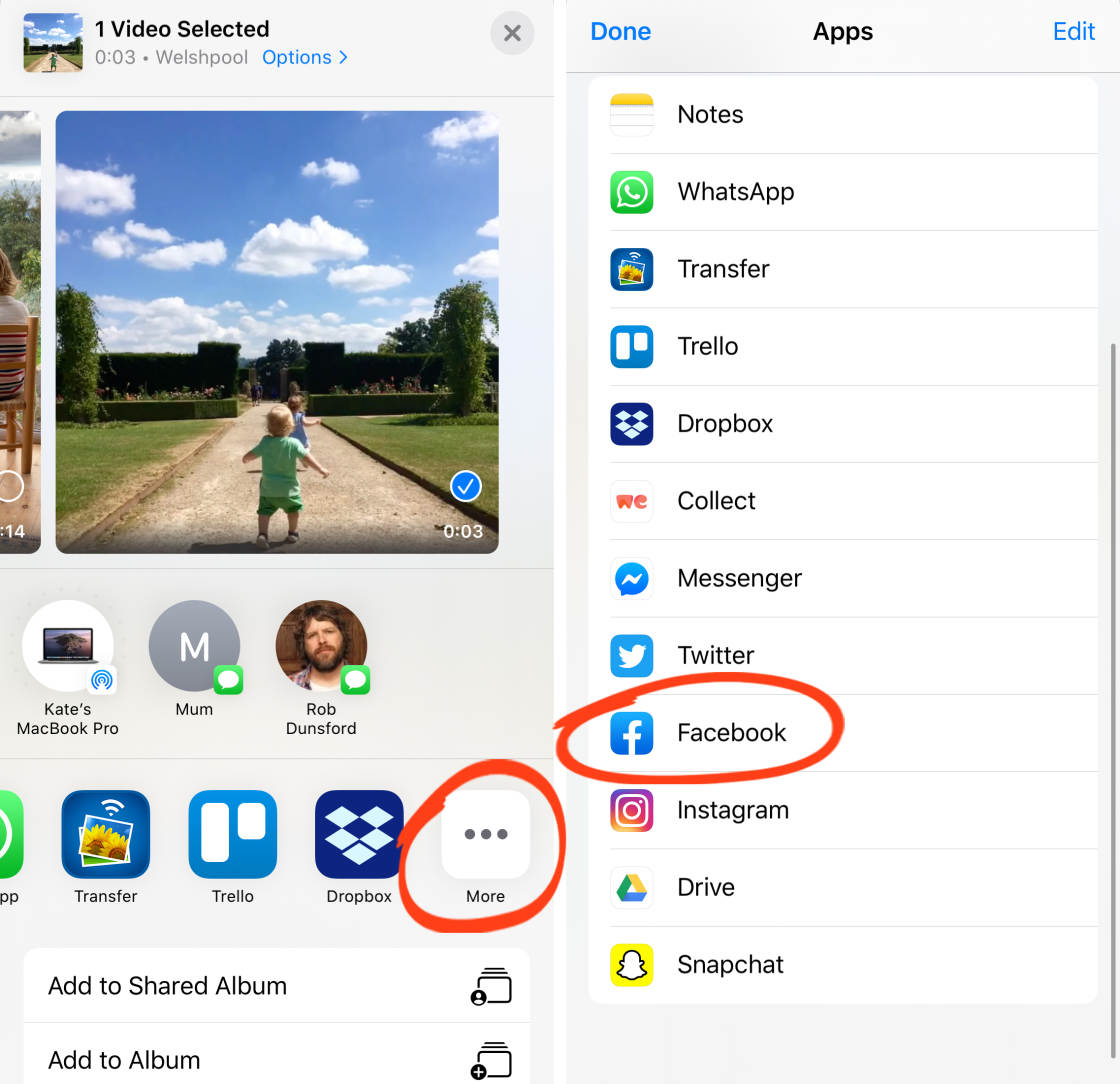
Write a caption if you wish, then tap Next. Select where you want to share the video to, then tapShare.
4.6 Share Live Photo Content On Instagram
You can share Live Photos, Live Photo videos, and Loop/Bounce videos on Instagram.
However, you can only share them as Stories or via a direct message.
Stories are photos and videos that appear at the top of your followers' Instagram feeds. They vanish after 24 hours. Direct messages are private messages sent to specific Instagram users.
Why can you only share Live Photo content as stories or direct messages?
Live Photos are converted to still images when posted to your Instagram feed. And Live Photo videos, as well as Loop/Bounce videos, cannot be posted to your Instagram feed. Videos shared to your Instagram feed must be at least three seconds long. Unfortunately, Live Photo videos and Loop/Bounce videos are slightly shorter.
What if you want to share your content as a Story or a direct message?
Note: Your Live Photo content must have been taken fewer than 24 hours ago to share as an Instagram Story.
To share Live Photo content on Instagram:
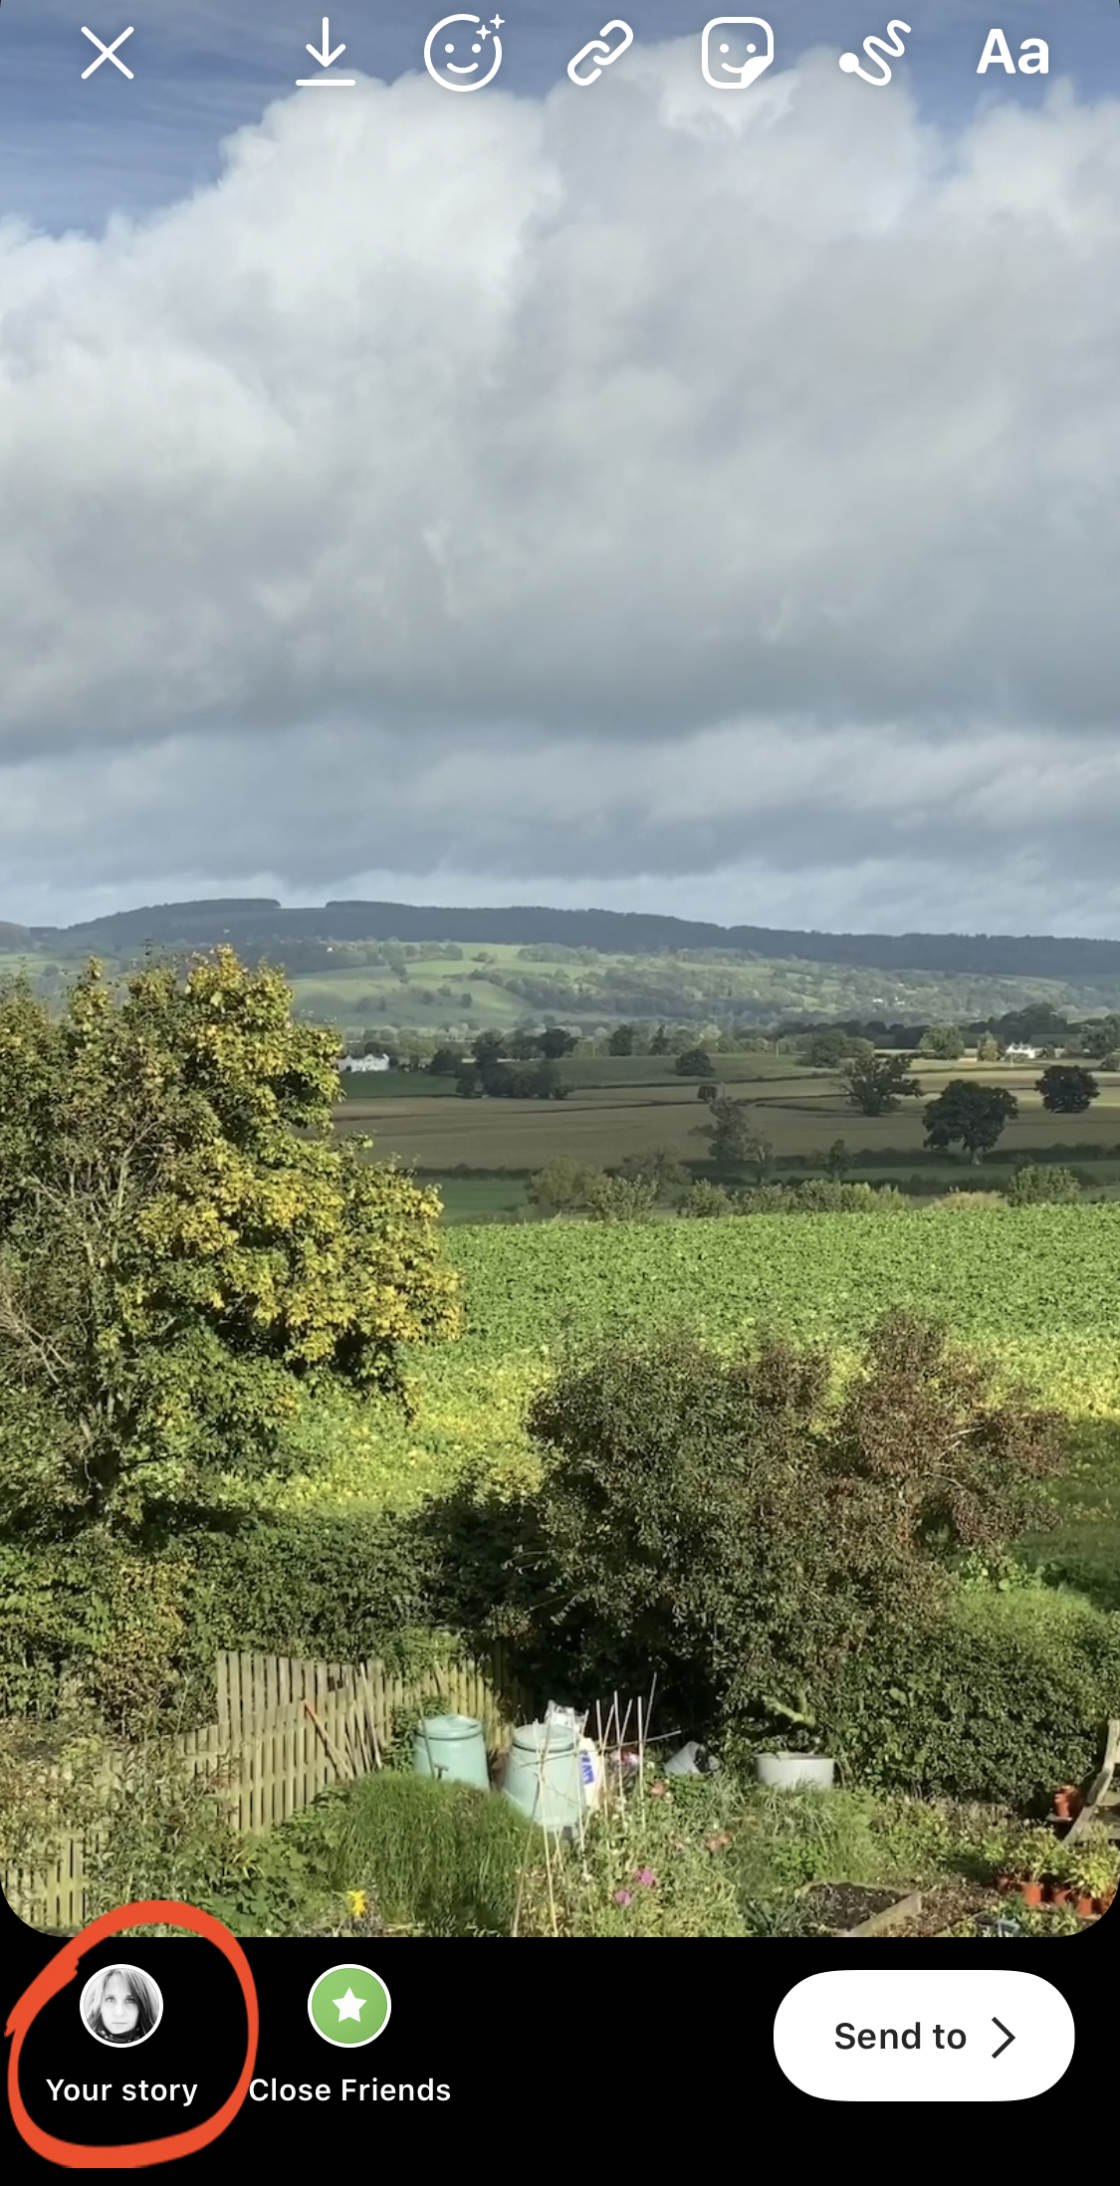
Open the Instagram app and tapYour Story.
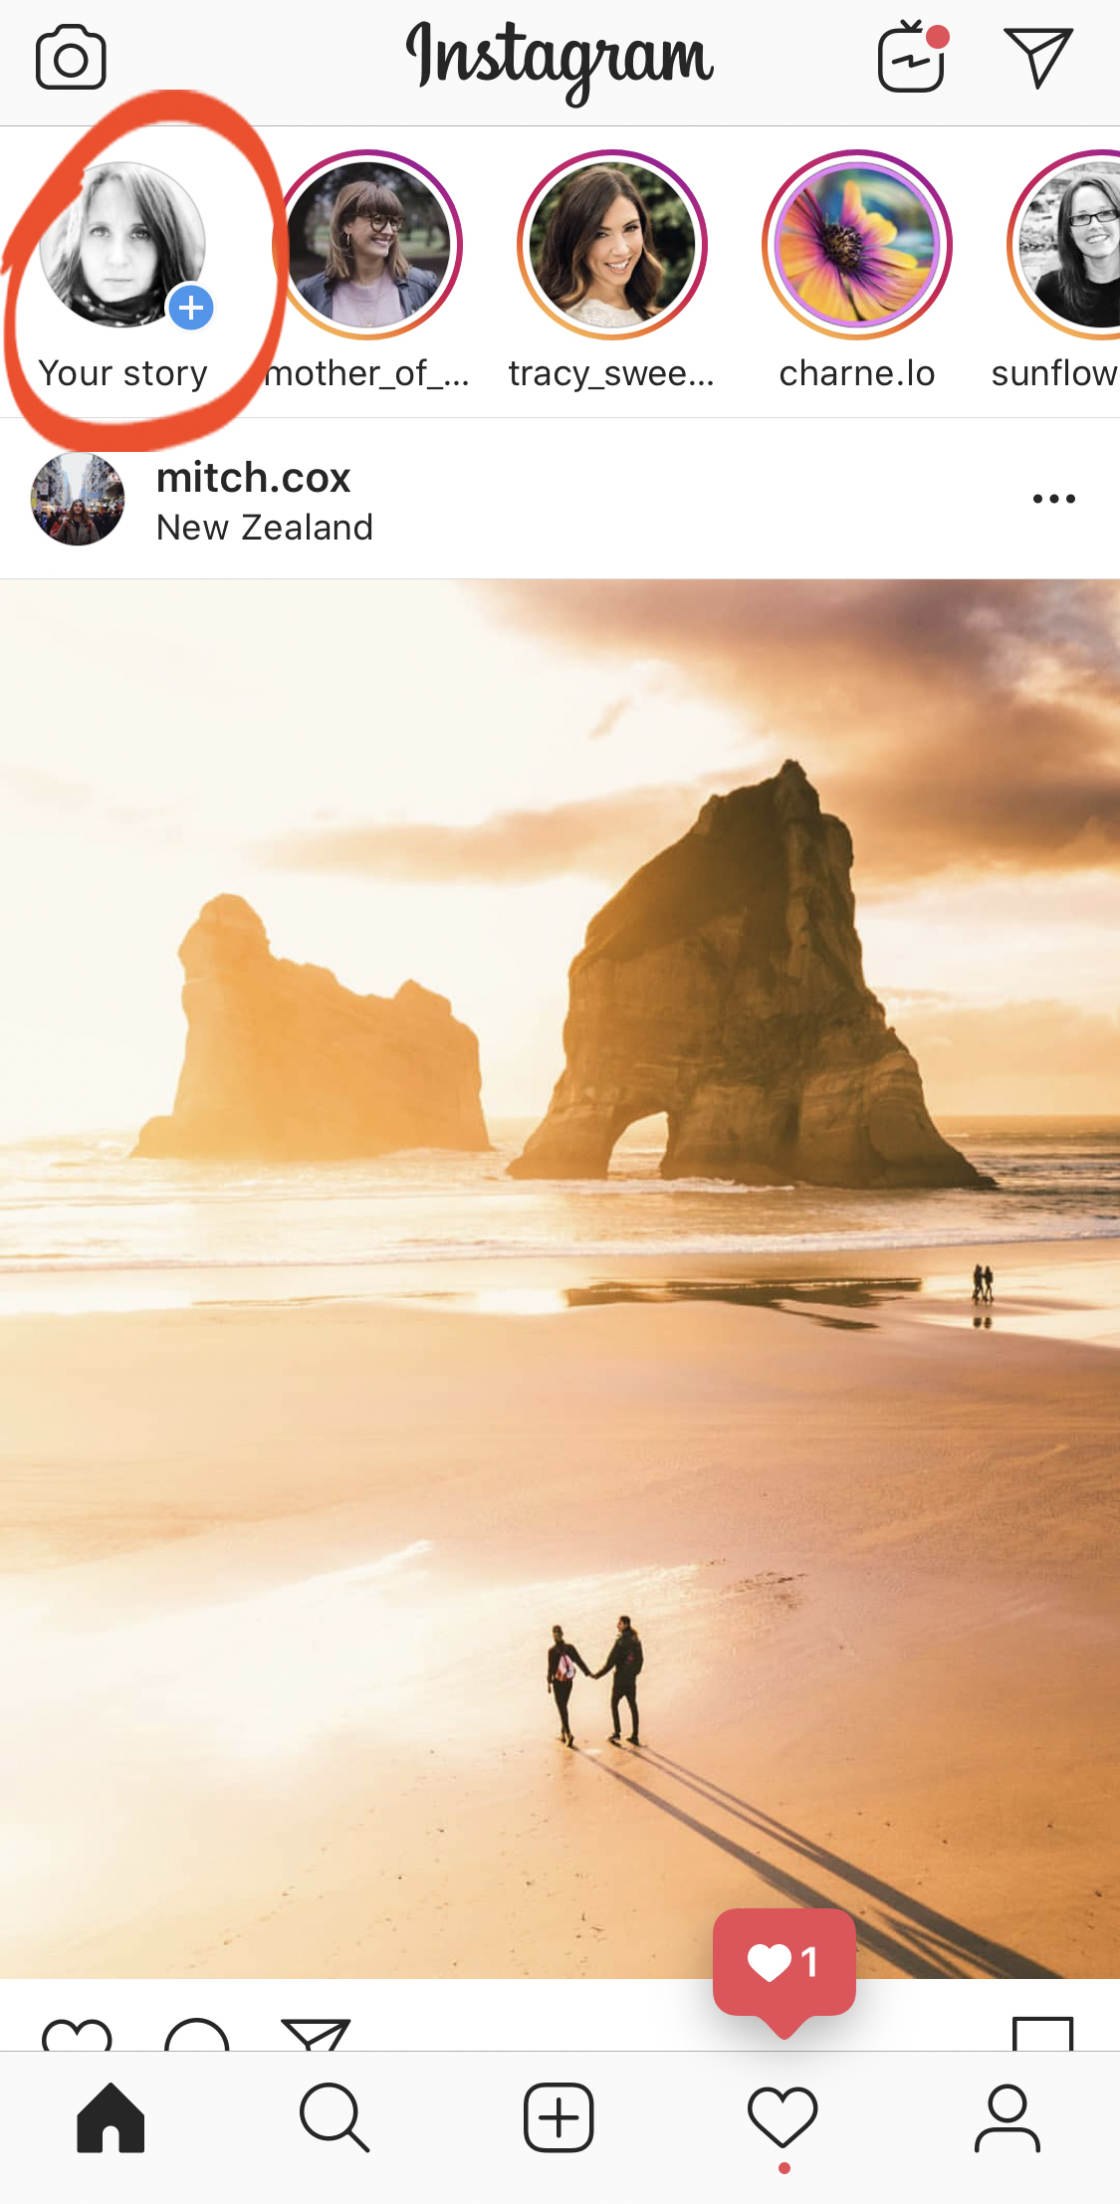
A camera will spring into view. Tap the image thumbnail at the bottom right to open your photo library.
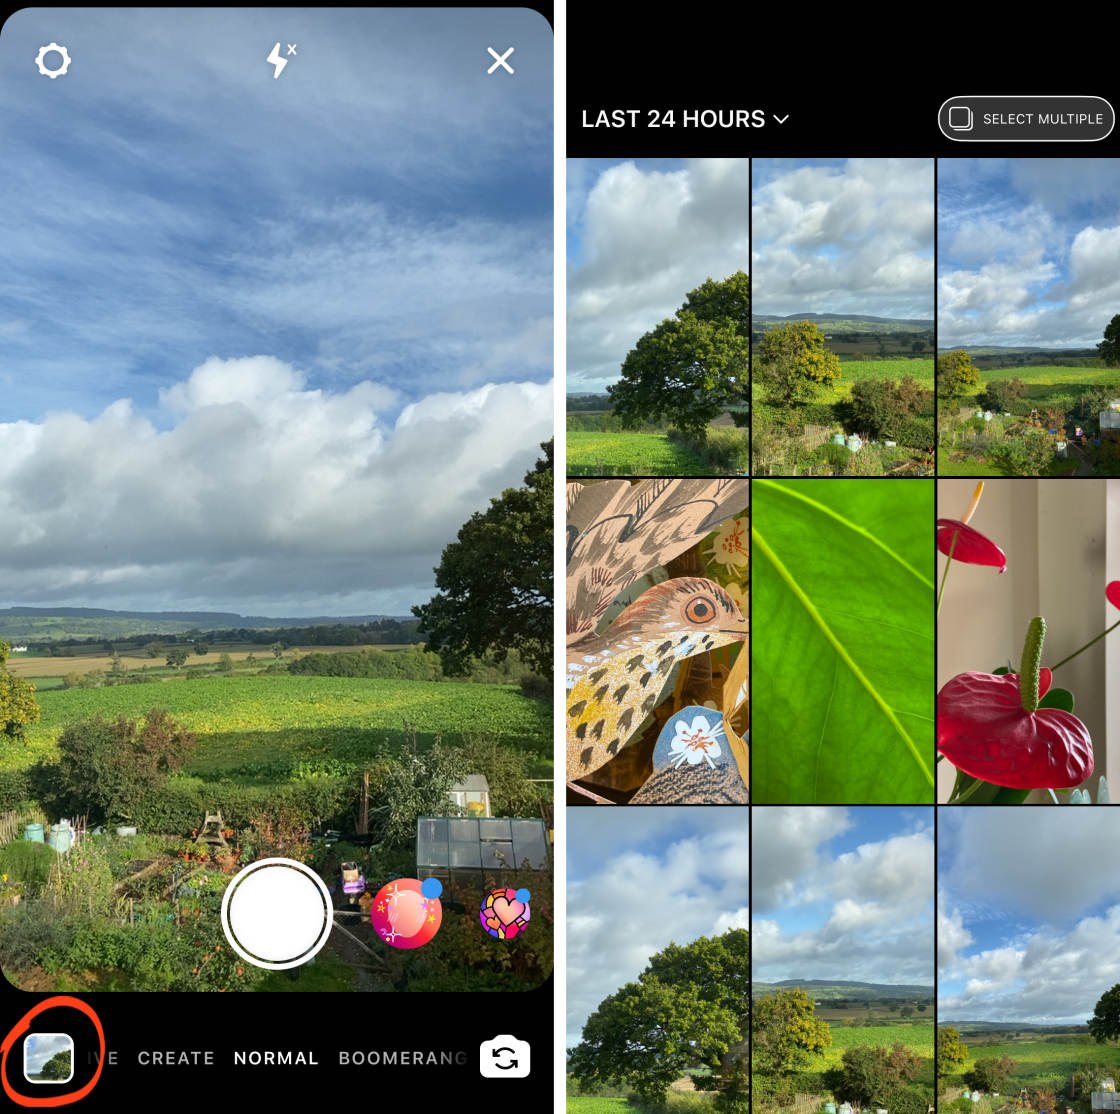
Select the Live Photo that you want to share.
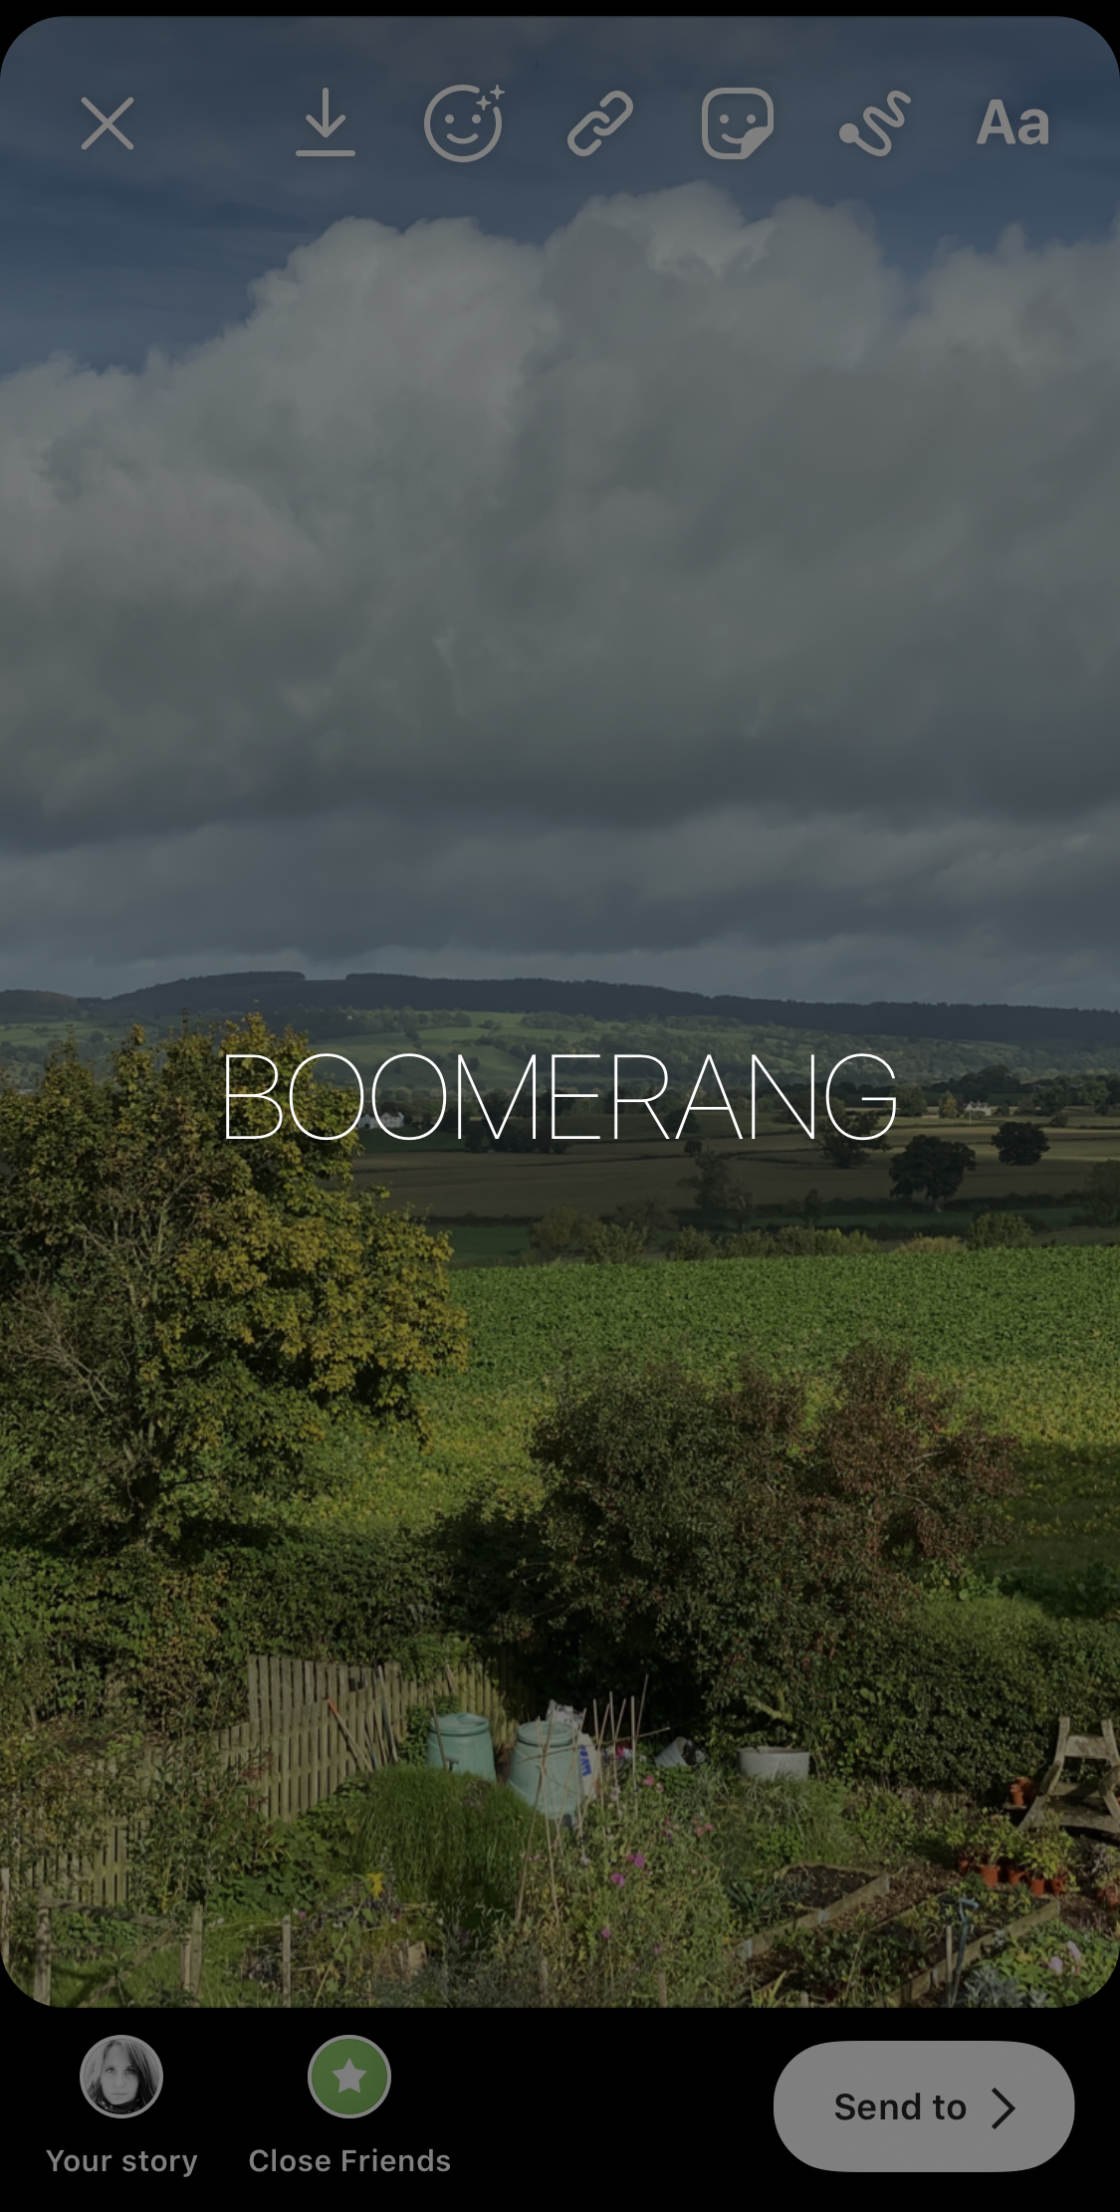
Then press on the image. Keep pressing until you see the word "Boomerang" flash up on the screen. (This ensures your Live Photo appears as a moving image.)
To share your Live Photo content as a Story, tap Your Story at the bottom of the screen. Once you've done this, users will be able to view the Live Photo content at the top of their Instagram feed.
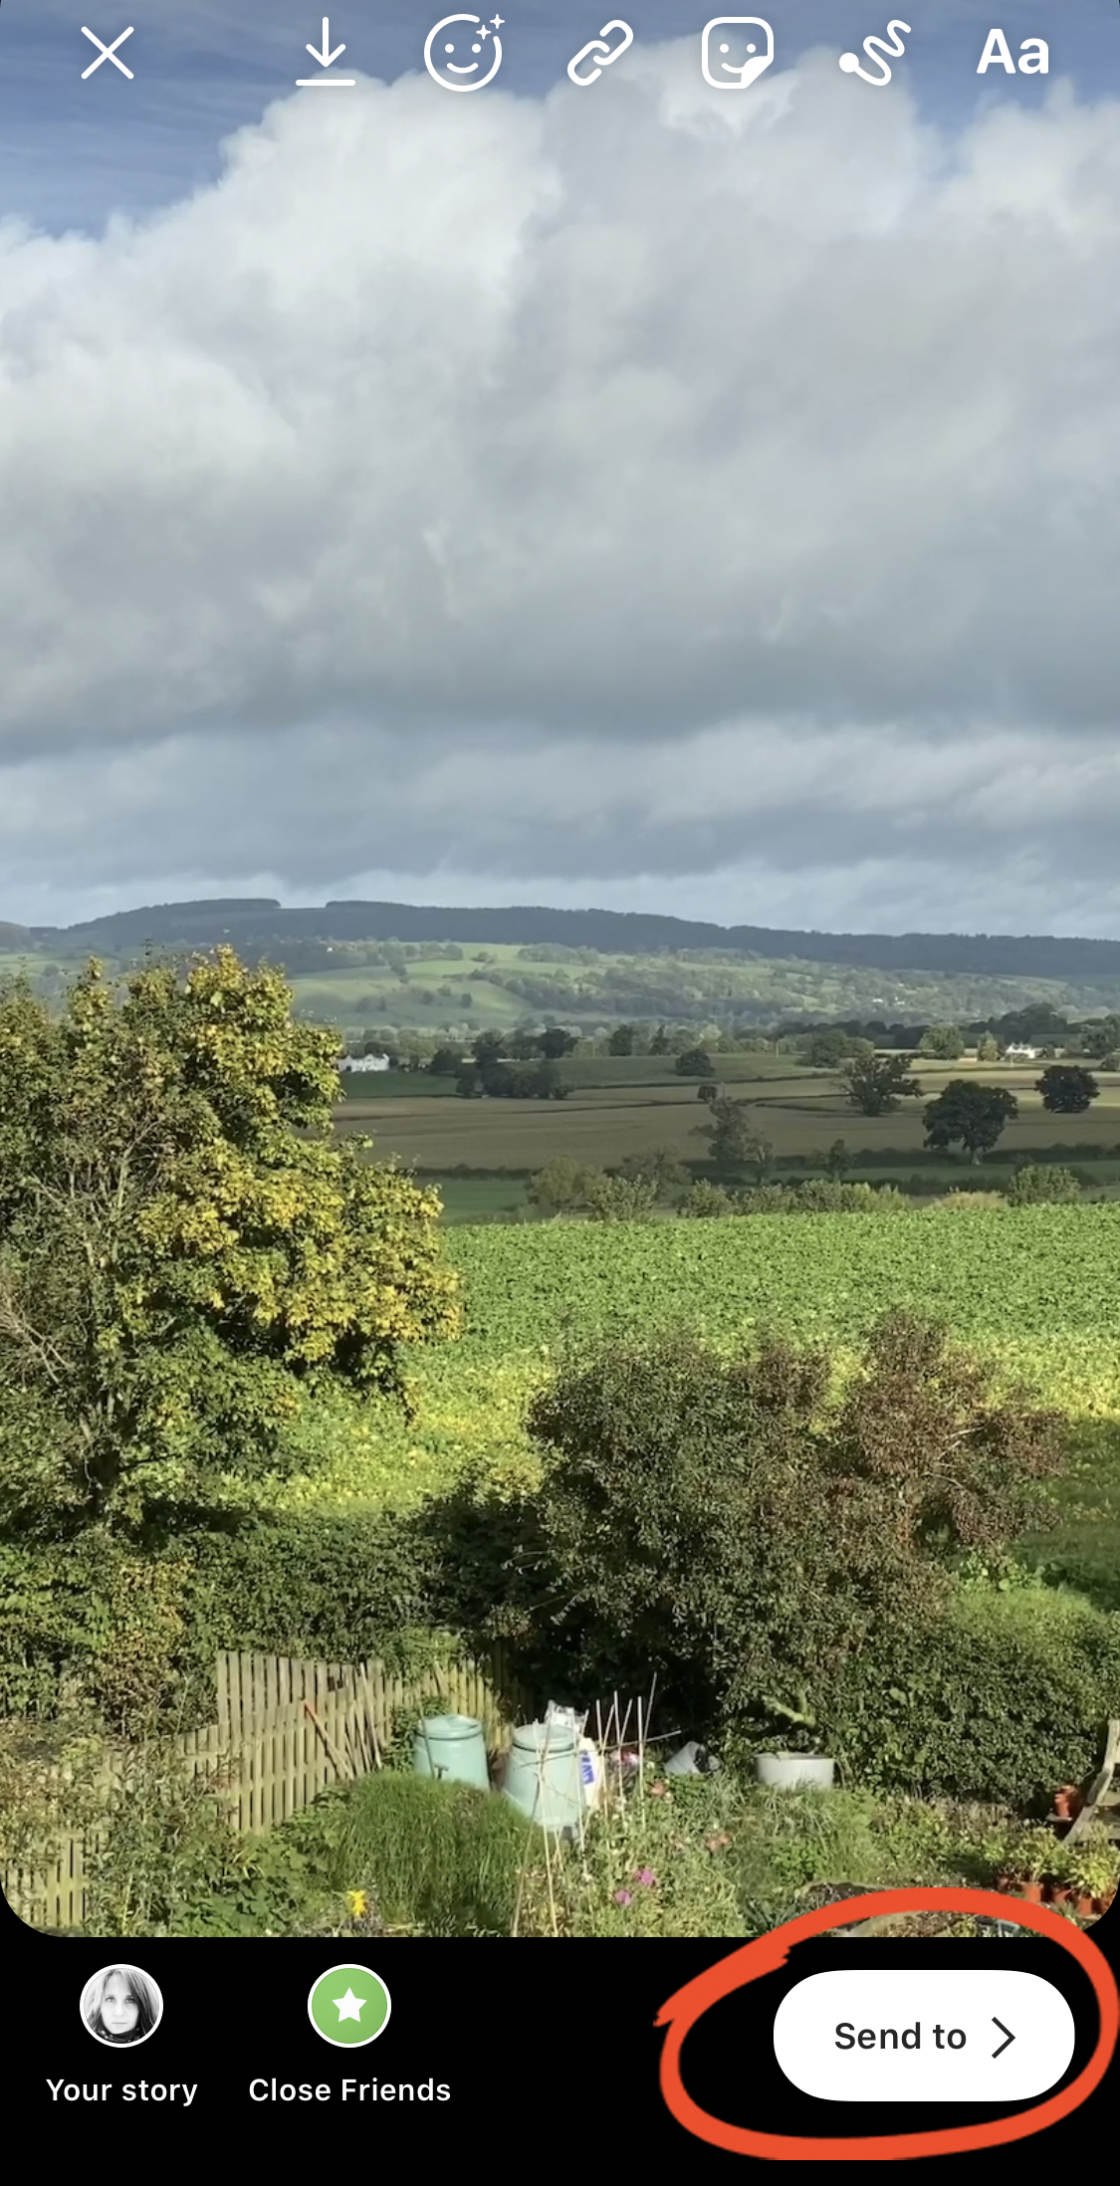
To send your Live Photo content to users as a direct message, tap Send To. Choose the users you want to share your Live Photo content with, and you're done!
How To Do A Bounce On Iphone
Source: https://iphonephotographyschool.com/live-photo-to-video/
Posted by: villanuevalibler.blogspot.com
0 Response to "How To Do A Bounce On Iphone"
Post a Comment